Showing posts with label marking. Show all posts

Monday, April 15, 2019

Forward Motion

....progress on the quilt at last.  No more pillows or puppies to interrupt the process.

I have a 4 inch wide border on my quilt that I am filling with a continuous feather that curves around itself.  After the feathers were done I went back and embellished them with gold, metallic thread.  I was going to fill the stem with pebbles, but when I got finished with the gold thread I noticed that the stem really stood out and looked pretty cool.  No pebbles - great idea!  I am calling this quilt "Desert Mosaic" because it is made up of the colors that represent our Southwest:  red, orange, yellow, turquoise.  It is a pattern of geometric interaction.  What do feathers have to do with geometric design?  They are a foil to the harshness of contrast and hard lines.  As it turns out the embellishment makes me think of cactus with their spines, centipedes, spiders, tarantulas and snakes indigenous to  the desert.   That may be kind of weird, but that is where my brain took it.  What do you think?

Feathered border.
The feathers in each section are exactly the same or the reverse.  I am a symmetrical person.  My quilt is a symmetrical design.  They are not perfect.  I am only human and sometimes the needle takes over and I have to say, "OK" or rip it out.  How do I mark these long feathers and related designs on black fabric?

1.  I draw the designs out on tracing paper.

2.  For the feathers I transfer the basic shape of the stem onto an old manilla file folder and cut out the shape.  I use the old childhood magic of heavy pencil lines, turn the paper over and rub the back until the pencil line transfers, then cut it out.  You can also cut up the tracing paper and trace around it, but I prefer not cutting up my basic design if I don't have to.

Transferring design elements (see below for the individual small patterns)
TIP:  We have tons of useless folders from DH's working years but cereal box cardboard works too.  You can tape pieces together for a long form, and it is a lot cheaper than template plastic especially if you will never use these patterns again.

Large manilla patterns.  The big one is for the basic feather stems.
3.  I pin the cardboard pattern to the quilt (down into the cork board under my ironing board cover), and trace around the shape with my white ceramic pencil.

4.  From there I draw the additional elements by hand with a white ceramic pencil.

5.  For smaller elements that need to be very precise I make little patterns out of the manilla folder.

Small patterns for the final border.
I have another two inch border yet to do, but then I can move on to my first attempt at prairie points, with some experimentation for a different sort of point.  I'll share with you how it turns out, but that is down the road a bit.

Sew some happy seams this week.  I wish you fun making cheap patterns from a Captain Crunch box.

Tuesday, February 28, 2017

Rules of Quilting

Every quilter must know and follow the rules....right?

When piecing:
  • *all intersections must meet perfectly
  • *seams should be perfectly straight and 1/4 inch deep
  • *mitered corners must be at exactly 45º
  • never use a steam iron to press your seams
  • always starch your fabric
  • never starch your fabric
  • always pre-wash your fabric
  • don't bother to pre-wash your fabric
When quilting:
  • all stitches must be exactly the same length
  • the machine must run at the same speed (tell my foot that!)
  • free motion means no pattern or lines to follow
How many of you follow all the rules (and the many more I haven't mentioned)?  How many of you have been arrested by the quilting police? There are many "rules" that will make your finished product better (i.e. the ones with a *), and there are others that may or may not make a difference.  Making a quilt is a major project, and it probably won't be perfect throughout.  Will anyone notice?  Probably not.  It is up to you to decide how perfect you want it and I can almost guarantee some reverse sewing will enter into achieving high levels of perfection.  You have to be your own quilting police person.

I got a comment last week by a reader who was pleased to know that it was OK to draw lines to follow when free-motion quilting.  I am an inveterate line draw-er.  My very first FMQ teacher complained that she cannot draw well with pencil, but has no trouble drawing with her machine needle.  I am the opposite.  If I am quilting a defined shape or grid I mark the lines on the quilt first.  Because long, straight lines are a major challenge I use my dual feed contraption to do a large grid.  The tiny ones I do with FMQ.  I can do feathers freehand as long as I have a boundary line within which to work.  I am comfortable with background fillers, as they are fun to play around with and are truly free-form.  Organic forms do not have to be a perfect shape and actually look better when they are free from restraint.  Sometimes I get them too free and have to take out some stitches, but that's OK.  I get it right the second time around (or maybe the third) (or fourth).

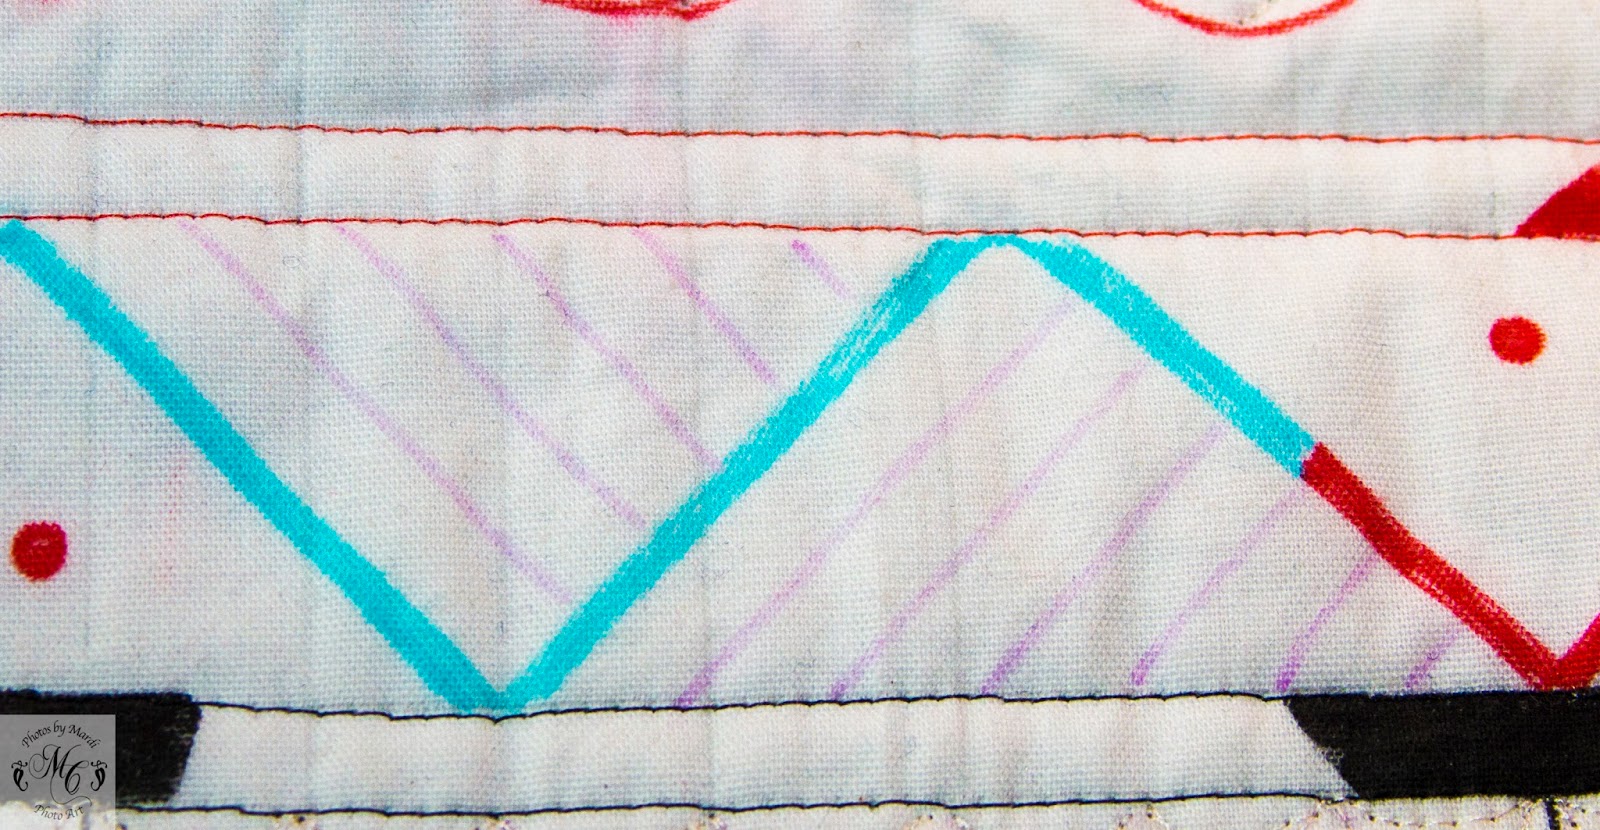
Below is a photo of my current quilt, which is nearly done.  I want you to see the lines.  All of the feathered and associated shapes have been drawn out with a turquoise, removable pen because I want them as exact as possible.  The turquoise is still very visible, but will disappear with water.   Sometimes I find a drawing error or change my mind and will redo it with a purple, removable pen as I go.  The purple disappears in air, so it is really a last minute marking tool.  For the straight lines at the edge I drew a guide line every half-inch to keep me from veering off.  Big or small I really depend on my marking, and guess what?  The quilting police don't even care, or at least they have never knocked on my door.  Besides I told the dog to chew on them if they come.

See all the markings?  I don't always hit them perfectly...but close enough.
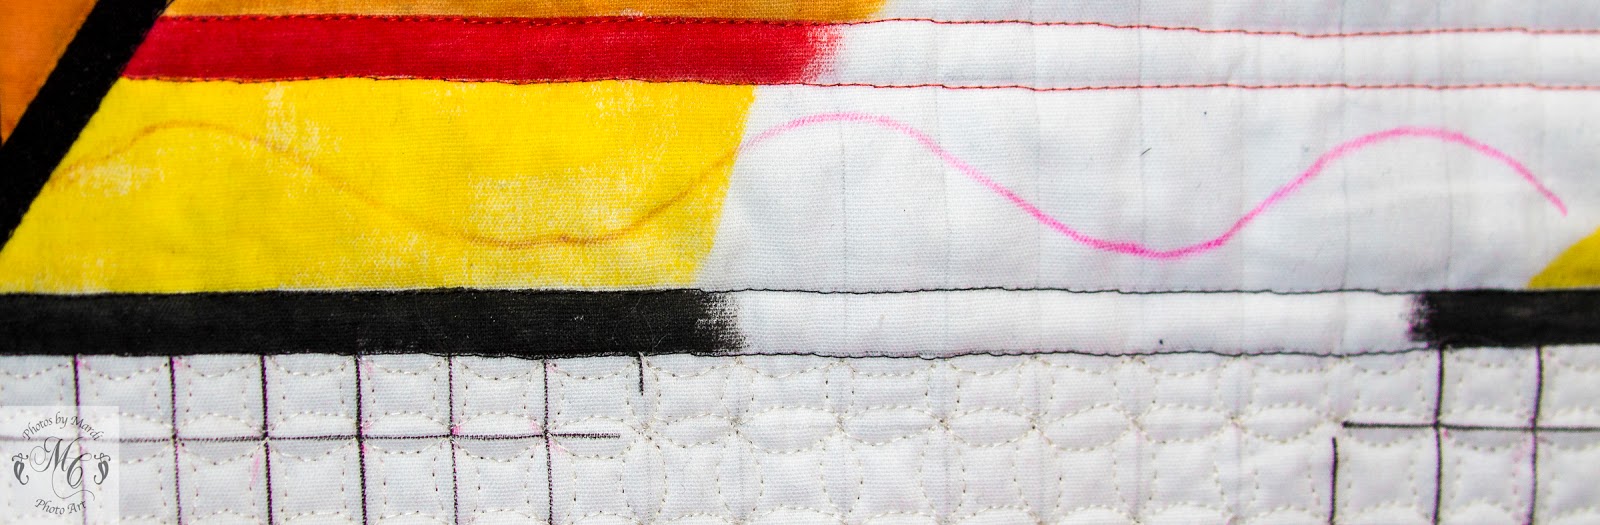
On dark fabric I use a ceramic pen, which I can rub off with my quilting glove.

Ceramic pen.  Imperfect point.  I may have to do something about that!
I discovered something you should know.  Stitching a large, perfect circle with no bobbles and perfectly even stitching is harder that doing straight lines.  Beware and be aware!

Sew a happy seam this week.  I wish you no visits from the quilt police.

Monday, February 20, 2017

Micro-stitching

Micro-stitching is something I like to do.  I like to cover the quilt with lots of stitches.  I like the way it squashes the background and lets the design puff out.  I sew slowly as that is the only way I can maintain control of my free motion quilting.  My followers are aware that I work on a domestic machine, and I have learned to put up with occasional wrestling matches between me, the quilt and the sewing machine.  I have made it clear that I am in control...except when I am not.

I got busy quilting my pretty design and planned to stitch a micro-grid in the center.  When I was ready to do that the approximately 1 1/4 in. center was a huge puff.  Was I going to be able to do it?  YES!  I planned to win this one and I will tell you how I did it.

Look at that puff in the center!  Urghhhhh.
I knew that I could not do it without marking.  Sewing straight lines is hard under any circumstances, but these were really short and close together with a real risk of running into the surrounding feathers.  Marking is my crutch so I did that first thing.  I lined up a 3 in. square ruler with the diagonal line on top of the straight fabric grain and the center of the design, then drew a line along the straight side of the ruler with a purple marking pen.  From there I could measure and mark additional lines 1/8 in apart.  Rotate the ruler 90º, line up the previous marks with the perpendicular ruler lines and draw the rest of the grid.  It has to be done carefully and with a light touch because the puff is not a firm base for drawing.

Diagonal line of the ruler on the straight of fabric and design
Grid drawn with removable pen marks
There...it looks nice to the eye so I am ready to stitch.  Slowly.  Stitch by stitch.  Grids require some backtracking so be prepared.  Put in an extra stitch at an intersection and turn right or left as required.  Stay out of the feathers!  Keep the machine going at at constant speed.  Move your hands carefully.  Hold the quilt loosely.  The thread is 100 wt Kimono silk from Superior.  When the quilt is finished and soaked, that thread will sink into the batting and the eye will see the texture more than the stitching.

Water spritz removes the marking. 
The stitching is not perfect.  I wish it was, but you have allow yourself some slack.  No one is going to notice the irregularities.  This is not a very important element in the overall design.  Using a ruler foot and straight edge, thick ruler might have made it more perfect, but that is a $100 outlay up front and a fair amount of practice.  Not ready to do that right now.  Sometimes when I start I will stitch to the right of a line and the next stitch to left of the line, which is not good.  Straight lines should not zig-zag!  When I make that big of a mess I will rip it out and start again.  This grid I did with no thread breaks - no additional stops or starts.

Sew a happy seam this week.  I wish you straight stitching on your straight lines.


Sunday, October 25, 2015

More Marking Methods

Last week I wrote about marking every little line for the pumpkin seed pattern, but different designs require different treatment depending on their complexity and the quilter's expertise.

This quilt of mine requires a lot of interesting background quilting.  It certainly isn't boring, but I have spaces that need to be filled with designs that will remain decorative but unobtrusive.  With that in mind I have made them regular and repetitious but (hopefully) engaging.  Each design fills a relatively small space and in order to sew them nicely I feel compelled to provide guidelines, but I don't need to mark every line.  There are multiple ways to do that depending on the design, so here is what I have done.  My marks today are with a pink pen which has ink that disappears gradually in air and all the way with water.

I am quilting the quilt completely and then sewing a thread-painted bird onto it.  The background is painted with Intense pencils before quilting, but I did not paint in the areas that will be covered by the bird, leaving those areas plain white.  However, I will still be quilting in those spaces so that the back of the quilt will not have big, un-quilted blotches behind the bird.  [The following photos do not adhere to any consistent scale so ignore the size differences]

The first items that need marking are 1-inch circles in which I am stitching a sunburst with curved rays.  I found I needed a grid to keep an even number of rays coming out of the center in a regular manner.  The red is drawn with micron pen and intended to be permanent.  I will not be quilting on that red line.  You can see how I marked the grid.  I free motion quilted the inner circle and then the eight rays in the manner of the blue line, moving from the center to the outside red circle in a curve and backtracking back to center, then moving on to start the next ray at the next gridline on the center ring.  They are not perfect, but they are close and reasonably regular, which I like.  Read on to see the next photo, which shows a bunch of them completed.  I will stitch pebbles
around the sunbursts eventually.

Sunburst grid
Next I have some rows of triangles,which I am filling with free motion straight lines.  I marked a few lines in each triangle to help me keep the lines as straight as possible.  Since this photo is taken of an unpainted area I used blue marker for the triangles.  The stitching will show on the back so it needs to look right.  Straight lines are not easily done with free motion, but these are too short to mess with a walking foot and turning the quilt a jillion times.  With practice it is possible to learn do them pretty evenly, and as I mentioned last week they don't have to be obsessively perfect to look nice.
.
Guide lines in the triangles
Finished sunbursts and triangles
The last areas to fill are some yellow rows that are only 1-inch deep.  I decided to do feathers, but I wanted to keep them fairly regular so I made a pattern of the curve I wanted for the spine, and cut it from a double layer of freezer paper (shiny sides ironed together).

Freezer pattern for feather spine.
Feather spine
I love doing feathers and do not need to draw them out so I will free-motion stitch them along the spine.  If  you are not comfortable with free feathers, they could be drawn with a marker too.

Feathers
TIP:  Last week a comment was made about marking with Frixon pens.  They seem magical as the marks disappear with heat from an iron or hair dryer.  I want to warn you that these pens are made for paper and not for fabric.  Their behavior on fabric was unintended, unplanned and not guaranteed.  The problem with them is that if your quilt gets cold or is shipped somewhere in freezing weather the pen marks will reappear.  It is clear that although the ink becomes invisible, it remains in the fabric in some form.  In many cases this is not a problem, but at least be aware.

Sew a happy seam this week.

Saturday, October 18, 2014

Marking the Quilt

I promised to talk about the quilting of my spiral quilt this week, but I think it is important to address marking techniques before I go into the actual sewing process.  As a newbie I was deeply puzzled about how to mark my quilts, but slowly I learned many different methods with varying degrees of success. I will share with you my opinions about the tools that I have used over the years.

1. Chalk
Chalk for marking is available in pencil form and powder form.  The pencil form has pieces of chalk that fit in a mechanical type pencil.  The chalk comes in several different colors, and refills can be purchased.  The powder form is used in a dispenser with a cog roller at the bottom.  You can purchase refills in white and blue.

Pros:  Tried and true method for marking fabric.  Easily removed.  Chalk sticks can be sharpened, but the point doesn't last long.  Both come in colors that will show on light and dark fabric.
Cons:  Chalk sticks break easily.  Chalk brushes off easily so you can mark only a small area at a time.

Chalk
2.  Pouncing Chalk
To do this you must first punch holes in a paper pattern.  This can be done by running the paper through the sewing machine using an unthreaded needle to outline.  By stapling several layers together you can make more than one punched pattern at a time.  However, usually you can use the same piece several times.  Once the holes are punched, lay the pattern on the quilt bumpy side up and gently glide the pouncer across the template (don't whack it from above).  Lift the template and the chalk outlines your design.  The chalk comes in both white and blue.

Pros:  Once the holes are punched this is easy and accurate.  Either white or blue shows up well on most fabrics.
Cons:  The chalk rubs off easily so you can prepare only a small area at a time.  It doesn't work well for a very complex design.

Pouncing chalk and Golden Threads tissue
3.  Golden Threads Tissue
This tissue is a sturdy, yellow tissue paper that is great for punching holes for use with pouncing chalk.  You can also draw or machine stitch (unthreaded) the design on the paper, pin it to the quilt, and sew through paper and quilt.

Pros:  The design is clear and easy to follow.
Cons:  This paper is too thin to run through a printer.  If you sew through it on the quilt you must pick out the paper when you are done, and some tiny pieces invariably get stuck in the stitches.  I have a good pair of tweezers on hand for this problem.

4.  Blue Water-soluble Marker
This marker has become a standard in the industry.  It leaves a blue mark on the fabric which disappears with water.  DO NOT IRON.  There is also a Blue Line Eraser currently available (I have not tried this).

Pros:  Works beautifully and is one of my most used tools.  It stays until I am done with my quilting.  Washes out with water.
Cons:  Doesn't show up on dark fabrics.  Can dry out, but you can keep it in the freezer between uses and it works like new (I have not tried this).  Cannot iron over it.  I have also heard that the ink sometimes disappears spontaneously (hasn't happened to me!).  As I say, I have encountered no issues with this marker on my quilts (100% cotton), but some people have had problems.

Blue Water-Soluble marker
5.  White Marker
There are two white markers on the market.  One is water soluble (I have not tried this) and the other disappears with heat, i.e. the iron.

Pros:  Shows up on dark colors.
Cons:  My experience is with the heat-removable variety.  I found that it didn't show up immediately, which I don't like.  When it finally appeared, it was hard to see.  I marked a big quilt and by the time I got 1/4 of the way through my quilting all the white marks had disappeared and had to be re-marked.

(No photo - I no longer use this)

6.  Purple or Magenta Disappearing Ink Marker
This marker is visible for 2-3 days and disappears when exposed to air or water.

Pros:  Handy for marking when needed for only a short time.  Can be removed with water if desired.
Cons:  Doesn't show up on dark colors.

Purple and Magenta Disappearing Ink markers
7.  Ceramic Pencil
I love my ceramic pencil.  Mine is made by Sew-Line, but there are other brands.  The ceramic "lead" is like chalk, but is sturdier, thinner and doesn't brush off as easily as chalk.  However, it can be erased with the eraser on the pencil or by rubbing with a piece of fabric.  Refills of the ceramic filler can be purchased in several colors.

Pros:  Easy as a pencil to use.  Gives a fine line.
Cons:  Keeps getting buried under fabric because I use it so much!

Sew-Line Cermaic pencil
8.  Colored Pencil
Colored marking pencils come in several colors and have for years.

Pros:  Marks a relatively fine line.  Doesn't smear.  Lasts long enough to do the quilting.
Cons:  Yellow may be difficult to remove.  Constantly need sharpening and the points break easily.

(No photo - I don't use these either)

9.  Frixion Pen
These pens come in different colors and can be purchased at office supply stores as well as quilt stores.  A hot iron removes all visible marks.

Pros:  Easy to find for purchase.  Gives a clear fine line.  Several colors.  Will iron off.
Cons:  Although the color of the ink is removed by the iron, a residue is left on the fabric, which shows up if the fabric is frozen.  Sometimes it shows without freezing.  I do not use these.

Frixion Pen
10.  Freezer Paper Template
I recently stumbled onto this one.  Trace a design on freezer paper and cut it out.  Iron it onto your sandwiched quilt and trace around it with the blue water-soluble marker or ceramic pencil.  Remove the freezer paper and repeat where needed.  Works great.

Pros:  It is easy to trace a design on freezer paper.  It stays put after ironing while you trace around it onto a quilt sandwich.  The template can be reused numerous times.  It is cheap.
Cons:  It takes time to cut out the template.  You have to be careful not to iron over any of the blue marker if that is the marker you used.

Freezer Paper
11.  Hera Marker
The Hera Marker is a plastic tool with a sharpish "blade" on one end.  It is not sharp enough to cut anything.  You can draw a line by pressing the blade end on the fabric.  It leaves an indentation that lasts long enough to sew a short distance.  You can draw a curve or a line on which to perch some motifs so they will line up properly.  Also useful for "finger" pressing.

Pros:  Handy and quick to use.
Cons:  Indentation is short lived.

Hera Marker
12.  Sulky Sticky Fabri-Solvy
This is a fabulous water soluble product.  You can draw on it or run it through the printer, peel off the paper backing, and it sticks to the quilt with a light adhesive.  You quilt right through it and the quilt sandwich.  You can also use it as a soluble stabilizer.

Pros:  Stays put while you quilt, but pulls away easily if you need to reposition it before sewing.  I used it for a complex design that I wanted to be as symmetrical as possible, and it worked beautifully.  It completely dissolves in water with a little soaking and a little hand agitation.  I have used it on 100% cotton and it does not appear to have left any residue.
Cons:  It is more expensive than other options (about $15 for 12 sheets 8.5 x 11 inches).


Below is a piece of recent quilting I have done.  The animals were cut from freezer paper and I traced around them with a ceramic pencil.  I also used the ceramic pencil to place the red diamonds as they had to be positioned relative to the quilt's center.  I tried pouncing chalk for the feathers, but the chalk dots looked like a starry sky and I couldn't tell where to quilt.  Eventually I drew the border design on tracing paper, scanned it into my computer, printed it on the Sticky Fabri-Solvy, stuck it to the quilt and began quilting. Fabulously easy!  The fillers and the lines of pebbles were done freehand.  All quilting was FMQ on my Viking domestic machine.  The feathers were painted with Shiva Paintsticks after the quilt was all finished.

A portion of my quilt "Bigtop"
The caveat to all this is that you should test any marking tool on the fabric that you will be using.  There is no single way to mark a quilt.  Your choice of tools depends on the quilt, the quilting design for that quilt, and whether you are able to draw freehand with the needle...or not.  I like to draw out my major designs, but do all my fillers freely.  I usually use more than one technique before I am finished with a quilt.

TIP:  Don't be afraid to try new techniques.  Some work, some don't.  Some work for me, but not for you.  Experiment!

Bagged the Bag

My first attempt at a picnic bag was a fail.  You saw the pictures last week.  I kept revising the design.  I clipped where I shouldn't ...