Showing posts with label paper pieced. Show all posts

Monday, March 31, 2014

Blocks in a Border

The next steps in this Lifetime quilt were so much fun.  The idea behind the quilt was to catalog the things that have been important in the lives of my husband and myself.  I have a book which has blocks that are associated with every state in the union, "Create Your Family Quilt Using State Blocks and Symbols" by Barbara Brackman.  From this book I used blocks from the states in which we have lived and other blocks that represent things we remember and love.  There are no patterns in the book so I drafted them on the computer.  I also picked some blocks from other books and designed the columbine block.

The first set of blocks each have a 1/2 inch dark blue border and they are set on point and finish to 5 inches.  For newbees, this means that they are placed on the quilt with the points along the quilt's vertical and horizontal lines.  You can see what I mean in the following photos.  This means that the space around them must be filled in with something.  The filler I chose was pineapple log cabin triangle, which I paper pieced.  You sew a strip to each side of the triangle and put a cap on them, then do the next layer, etc.  They echo the inner log cabin border and provide and interesting background for the blocks.

Pineapple Log Cabin in Illustrator
In the Illustrator design some of the blocks are rotated the wrong direction.  This really doesn't matter because the drawing is always an approximation, no matter how precise, of the final result in fabric.  Once the blocks were made I laid them out on my bed and spent time running around arranging and rearranging until I had the blocks so that they pleased my aesthetic.
Side blocks in Illustrator
To assemble this border you sew one edge of the triangle block to one edge of the square block.  Then you do the same with the opposite edge of the square block.  This gives you a strip on a 45º angle.  Once you have all the triangles sewn onto all the blocks you sew the angled strips together.  No Y-seams to mess with.  This may be on a 45º angle (like bias), but all your edges to be seamed are on the straight grain of the fabric.
Assembing the squares and triangles.
In the fabric version you will see that I added a 1/2 dark blue border on the inside edge.  Eventually I will put the same on the outside edge, but that will wait until I get the top and bottom borders done.  The original design had a rectangular pink strip on the top and bottom of each side border, but the collection of 5 inch blocks came out slightly taller than Illustrator determined so I added the pink border all the way across to finish the top and bottom edges.    No, the finished quilt will not have a horizontal ratio!

Fabric side borders added.
TIP:  If you get into self-design, be flexible.  Sometimes things don't work out as you had envisioned. You have to be the kind of person who can adjust and come up with solutions to problems as they pop up.  Borders and/or blocks of fabric can equalize a design that goes sideways.  Take your time deciding what to do.

Saturday, February 15, 2014

Creativity and a Red and White Design

I am finishing the quilting on one quilt.  Another quilt needs to be blocked and bound.  A third one has been in the planning stages for 3-4 years, and I got started on it when I got stymied on the other two waiting for a couple of online orders to arrive.  You'd think all those UFOs would keep me busy enough, but the mind is a strange confusion of nerve connections and molecules, and they are always yelling at me, "What are you going to do next?"  I respond to my brain, "I don't know, but something will turn up, turn over, or arise from under the layers of my stash."  While one idea was formulating in the wings, I came across a Red and White Design Challenge tossed out by SewCalGal.  She is challenging her readers to create a new design and does not require that you make the quilt.  You can do that in Phase III if you choose to.  I am stimulated and inspired when the gauntlet is tossed onto my sewing floor.  I have to pick it up because my physical space is so limited.

The requirement is that the design be your own, but it must be red and white ONLY.  These are not really my colors, but I found the idea exciting and I have quite a few reds and white-on-whites in my stash.  You can use many shades of red and of white, but nothing else.  Below is what I came up with:
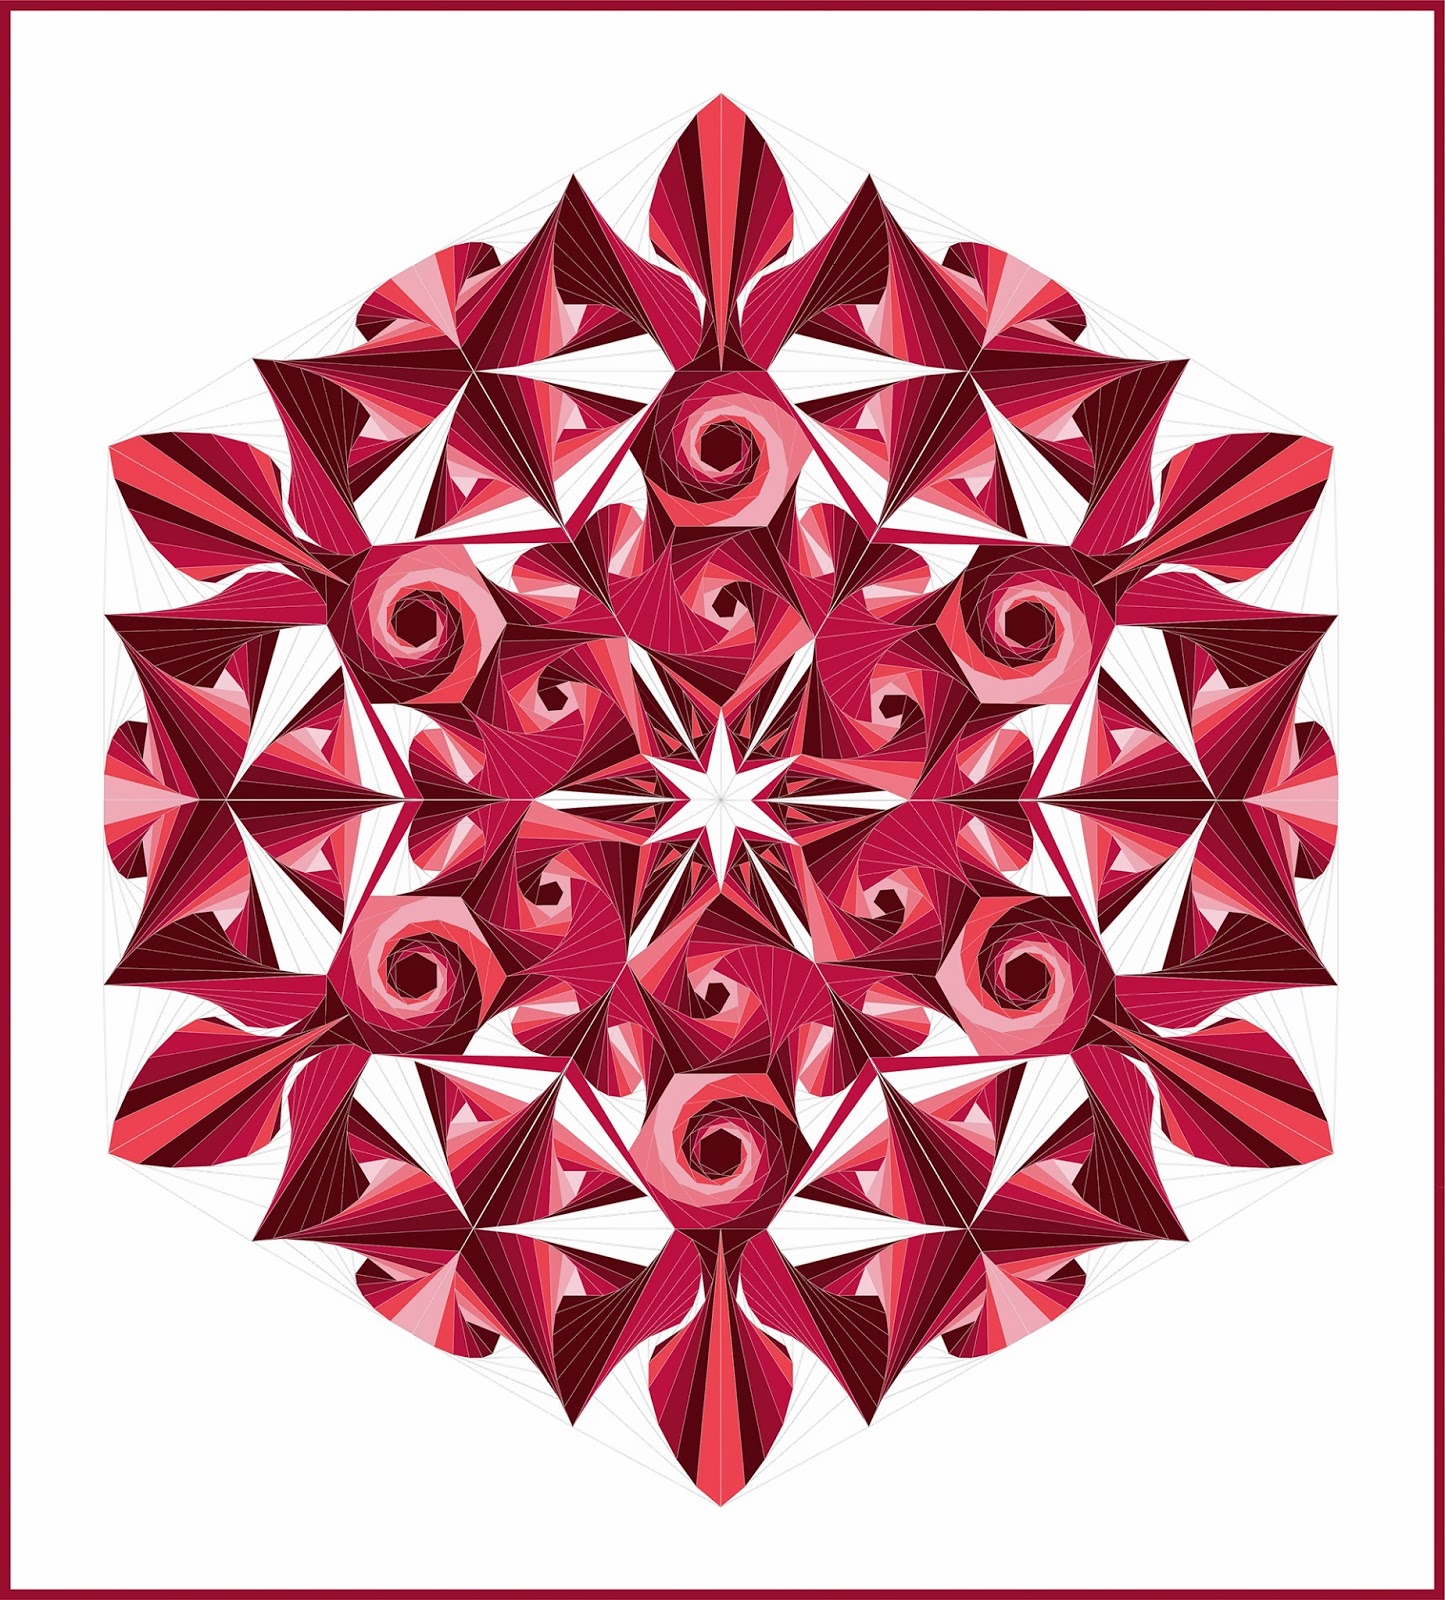
Red Galaxy
This quilt is all paper pieced using techniques for design and construction from "Simply Amazing Spiral Quilts" by RaNae Merrill.  I work on a Mac using Adobe Illustrator, which I like very much and because I think doing it with pencil and paper would be far more difficult.  I would have to own an eraser company.  I can also preview colors and fabrics on the computer, make changes quickly, and easily manipulate the design.

The finished quilt is 51 x 56.5 inches.  The Challenge rules also require that I post the amount of fabric needed so here it is:

Very dark red = 2 1/2 yards
Dark red = 1 1/2 yards
Scarlet red = 3 1/4 yards
Bright red = 1 1/4 yards
Dark pink = 1 1/4 yards
Light pink = 3/4 yard
Very light pink = 3/8 yard
White (can be various fabrics) = 2.5 yards
White for background (all same) = 1 3/4 yards

TIP:  Accept Challenges as they help you grow.  Try new colors as they expand your color perceptions.  Even when you don't win anything you learn new techniques, which you can use in other quilts.  You learn more about what you like to work on and what you are good at.  Sometimes you find out about things that you don't care about doing, and then you reevaluate and redirect your energy.


Bagged the Bag

My first attempt at a picnic bag was a fail.  You saw the pictures last week.  I kept revising the design.  I clipped where I shouldn't ...
