Sunday, October 30, 2016

Ditching the Quilt

Well, I missed blogging last week by visiting my granddaughter in Pullman, WA, and had a wonderful time with her and her mom.  When I got home I got smacked with numerous things that had to be done:  get another load washed before winter forces me to the laundromat, clean house (urghhhhh), complete repairing my mother's beautifully painted but damaged trays, sort out my sewing shed before the snow flies, etc...and thus no time to write.  Yes, my sewing shed is where I keep my stash and it is outdoors.  Not terribly convenient in cold weather, but protected and out of my way when I don't need it.

In spite of all that, I maintained my sewing routine of 2-3 hours a day driving the Baby Lock and got started on the quilting of my quilt.  I used two layers of batting:  Quilter's Dream cotton "Request" (low loft) and Quilter's Dream Wool.  The wool is wonderful to quilt as it gives beautiful puff to the quilting, but where you want to smash it down as filler it squashes tight to accentuate the main designs.

I ran into an interesting problem that was new to me.  I first stitched-in-the-ditch (SID-ed) the lengthwise and crosswise seams, then the diagonals, each from the center out.  When I looked at the back I discovered that the backing fabric was puckered along only one direction of stitching.

No photo.  You know what a puckered stitch line looks like!

TIP:  Sewing the initial lines from from the center to the outside keeps the quilt from getting pulled unevenly.  This applies to both the grain lines and the bias lines.  The goal is to keep the quilt as square (or rectangular or circular) as possible.  Blocking the finished quilt can straighten it to a point, but being careful at this early juncture makes it easier.

 I suspect that the puckered line may have been on the lengthwise grain as it has the least give.  Solution:  I ripped out that line, and since it went through the middle of a long point, I stitched in the outer seams of the point (dark turquoise in the photo below) to anchor that part of the quilt.  This worked because there was more give on the slightly bias angle.  As I quilted the filler of that point (to make sure my design idea was going to work) I discovered that I liked that the seam in the middle of the point was not stitched down, so I ripped out all the lengthwise and crosswise SID and stitched in the ditches of the outer seams of those four points.  Mission accomplished.  Pucker gone, ready to roll!

Center line (straight grain) of point not SID-ed.  Outer edges of darker fabric stitched down.
Filler on one side of dark fabric not done yet. Note that the corner remains at 90º angle.

TIP:  Sewing garments taught me the importance of fabric grain.  Remember that it is just as important in quilts.  I don't worry about it in paper piecing because the paper holds everything firmly as you work.  However, once the quilt is layered you might have to work around the strength of the grain line and the fluff of the batting while still maintaining its integrity.  By all means keep the straight grain of the top and the backing aligned and un-puckered.  Your quilt will not hang straight if the grain lines are not straight lengthwise and crosswise.  Puckers may ultimately become unsightly tucks as your quilting proceeds.

A spiral quilt has many paper pieced seams to create the gradations that make it so unique.  I have found by trial, error and lots of reverse sewing that it is best to SID along every single seam.  This keeps the straight lines of the spiral straight.  I have tried in the past to stitch a design across un-ditched seams and found that the seams pull, and ultimately my design gets interrupted by those seams popping up so the whole thing is a scruffy mess.  Somehow, if those seams are nailed down first, a subtle design across them works nicely.  Don't ask me why!

Right side not SID-ed.  Left side stitched down.  In this photo the visible
difference is subtle, but significant.

Once the SID is done I can work fancy quilting designs, and that gives the added bonus of getting rid of those pesky safety pins.  I can also work anywhere on the quilt, as opposed to working only from the center out, because the whole quilt is stabilized.

Tester SID-ed then quilted with feathers.
I find the back different and intriguing.

By the time I post this I will be finished with the SID.  I am glad as I find it tedious and tiresome.  However, it is a great way to learn to free-motion-quilt lines, either straight or curved.  It also makes the rest of the quilting much more fun.

Sew a happy seam this week.  I wish you straight, un-puckered seams.

Sunday, October 16, 2016

Pondering Problems

You have to recognize you have a problem before you can solve it, right?  Right!  I often have to stop and figure out the source of the problem when I am clanging sour notes on the piano.  With quilting I usually recognize the problem right away so the only problem is how to fix it.

I got lots of feedback last week and I thank everyone who took time to respond.  I too like the feather border, but I also like the idea that a diamond border would repeat the design that will be in the internal border of the quilt.  The inner border can't be feathers because there is a narrow feather along the edge of that inner border (see below).  I planned to quilt this inner border with diamonds, because it would echo the sharp points of the colorful paper-pieced parts of the quilt.

Then I pondered some more and decided to create the diamond border digitally and overlay it on the photo as below:

Digital diamond border and backing folded over the outer border.
It  just doesn't speak to me.  Back to free motion thinking.  My readers like the feather and so do I.  So....here is my solution:  I will carry the internal grid all the way to the internal border, eliminating the feathers there.  Then I will do small feathers in all the borders.  I KNOW that will look nice and will integrate better with the rest of the quilting design.

TIP:  When a problem gets resolved and you feel good about it, it is probably right.  I'm feelin' good!


My quilt is all pinned and the sewing room cleaned up:  card table folded up, containers pulled out to retrieve items dropped down behind...and vacuumed, thread organized, ironing board cover clean, tools picked up and organized, etc.  Tomorrow I will start quilting.

TIP:  I don't know about you, but I find a clean, organized space is easier to work in.  It won't stay that way long, but mine was cleaned up within 30 minutes and this was a deeper cleaning than I had planned.  I just got inspired and it was quickly done.

I can't say I enjoy the pinning process, but it is necessary to secure the quilt sandwich until I have done all the stitching in the ditch.  So, here I go......

TIP:  Keep the excess bits of batting from depositing fibers all over the quilt by turning the backing edges to the front and pinning them down so that that all excess batting is enclosed.  This takes more time to pin, but it is nice not to have bits of fluff sticking to the front of the quilt and getting caught in the stitching.  (see photo above)

Sew a happy seam this week.  I wish you successful solutions this week.


Tuesday, October 11, 2016

Decisions and Thought Processes

No matter what kind of quilt you make, at some point you must figure out how you will quilt it.  Maybe you like stencils.  Maybe you trace someone else's design. Maybe you draw your own designs.  No matter the origin you have to figure out placement, marking methods, thread choice and factor in your own capabilities.

I'm almost ready to quilt.  I have the thread except for the order that should arrive today.  I have the batting and backing.  I have 2/3 of the quilt sandwhich pinned together.  I wanted to try using Misty Fuse, but with blue marker designs all over I cannot use the iron....so back to the old faithful safety pins and a bandaid on one finger to prevent abrasion.  I tried a thimble, but it was too annoying.

One more problem to solve.  I have a one-inch, dark blue border on the outside of my quilt.  I have tried a wider border on the digital version of the quilt, but one-inch is what speaks to me.  How am I going to quilt it, considering that I need to have room to put a binding on it too?  More problematic is that the quilting design must not get caught in the binding unless I do something like stippling or straight lines.  The dark blue abuts a medium blue and I tried dense, straight line quilting across the seam.  No go.  I don't like it, and trying to use two thread colors was mind-bending, and my mind refused to bend.

Reject!
I could do diamonds as I will be doing on a one-inch border within the quilt, but I was afraid I would have trouble lining up the points and not catching them in the binding.  Perfection might be hard to achieve.  On the other hand, it would echo the quilting on an internal border.

Diamonds on the tester do not sing for me.
Now I am contemplating a tiny feather line, but I will have only 5/8 - 3/4 inch, and I can't let it get caught in the binding, but it is more flexible than the diamonds.

Should I do it after I sew the binding on the front, leaving it open to be hand-sewn to the back later?  It works nicely on a tester, but I don't know about the corners.  Time for another tester.

I like the feathers and they echo the rest of the quilting designs.  Click to see large
and you will see the binding seam at the top sewed before doing the feathers.
What about blocking?  Block it after the binding is stitched to the front and quilt when dry?  Will the after-the-blocking stitching alter the shape?  I know the quilt can be blocked after the binding is on.  I can also block it before sewing the binding down on the back.

I could mark the border with a ceramic pencil and keep the feathers on the inner side of the line  Block and bind after stitching.

This is what I will be contemplating as I sit down to stitch every seam in the ditch, before doing the fun, decorative quilting.  It will be awhile before I have to make a decision about that border.

TIP:  Take the time with thought processes such as these.  Do the testers.  You will be more likely to end up with a product that you like.

Sew a happy seam this week.  I wish you lots of ideas from which to choose.

SaveSave

Tuesday, October 4, 2016

Sewing? When?

Sewing?  What's that?  That is a summary of the past week.  Nothing accomplished in the sewing room except a big, neglected mess.  Instead we have been moving furniture from a storage unit one hour distant to a different unit 7 minutes from home.  That will be much more convenient and considerably cheaper.  Why do we have so much stuff?  That comes from raising a large family in big homes and then moving into a tiny, mountain cabin.  Don't get me wrong....we love our cozy, high country home, but what do we do with all the lovely antiques and other things that bring back such beautiful memories?  Slowly items are disappearing as we transport goods during visits to family in different parts of the country, but it is going at a car-capacity pace.

After that (and we're not quite done yet) we spent a day hiking among the colorful, golden aspen, came home and served dinner for seven people.  We had a whale of a good time, and that is always good.  We all need a break now and then, some good companionship and lots of laughs.

That came on top of the exciting news that my quilt, "Bigtop'" won Best of Show in the Domestic Sewing Machine category at the 2016 Quilt and Fiber Arts Festival in La Conner, WA.  They will be displaying the Best of Show entries for all categories until Nov 20 so if you live near, be sure to drop in.  This quilt is in my blog gallery, but I will showcase it here for you to see in context.

"Bigtop" front.

"Bigtop" back.
That's the extent of my blogging time this week.  More planned activities ahead so I doubt the sewing machine will see much action for a few more days.  I miss it, but life gets in the way sometimes and I plan to enjoy whatever I end up doing...even moving furniture!

Sew a happy seam this week and sew a couple for me.  I wish you laughter this week.

SaveSave

Sunday, September 25, 2016

The Perfect Quilt

I am slowly reading Quilters Newsletter Magazine, one of my standby subscriptions for many years.  This is the last issue after 47 years of publication, and I am chewing on every word and savoring every picture.  I will miss this magazine so I am including a couple of quotes from this Oct-Nov 2016 issue that are pertinent to my topic.

Thomas Knauer p 40:  
"There is no such thing as a perfect quilt. In my mind the great beauty of quilts is the fact that no matter how we try to achieve perfection the materials will always resist us. Fabric stretches, thread breaks. The geometric perfection of a plan will always confront the material reality of physics."

This is such a true statement!  It is also true that imperfections are often the underpinnings of creativity.  If you read my blog regularly you may think that I spend all my time messing up.  Well, I do my fair share, but you will note that I titled my blog "Quilting Solutions."  If there were never any problems, what would I write about?

Aside from the vagaries of materials and tools, where do problems come from?
  • Ignorance.  This does not mean you are dumb or stupid.  It just means you are still learning how to sew, or how to sew quilts.  There are certain techniques that must be learned and understood in order to create a good looking quilt that will stand up to ordinary use.  Take classes, join a guild, read books, talk to more experienced quilters.
  • Lack of skill.  You haven't had the practice yet to internalize the techniques of sewing and quilting quilts. Practice, practice, practice.  Make lots of quilts.  Do lots of quilting.
  • Carelessness.  We all have our moments.   We tend to get careless when we try to work extra fast (deadline to meet?), when we get tired, when our neck hurts, when our mind wanders, when the kids are screaming.  You need to get up every so often to stretch, walk around and get a drink of water.  I have even been known to do laundry and clean house!  Nothing helps me sew better than having a clean, tidy environment - however I draw the line at fanaticism.  I raised six daughters and would have tipped over the edge if I had been a super fussy housekeeper (moderation is good).
  • Sewing Machine problems.  Sewing machines are just that:  machines.  They get dirty, parts wear out, and adjustments slip.  Learn how to keep your machine clean and lint free.  Find a reputable repair person and take it in for regular check-ups and thorough, internal cleaning and adjusting according to his recommendation.  Always treat it kindly and it will repay the favor.
  • Pattern Difficulties.  Poorly written directions.  Design flaw.  If you are working with a purchased pattern you can try to contact the designer.  She (or he) may appreciate your input.  If you design your own patterns you'll just have to ponder the flaw, talk to others, check your bookshelf and Pinterest, and ultimately you will find a creative solution.
I run into problems because I design my own quilts, make the patterns and sit down to sew.  Things don't always work as I had planned, and often I did not notice that some part of the design would not follow my directions.  I combat my lack of foresight by making testers to try out ideas.  This usually turns up a problem or two that I can solve before I start working on the quilt in earnest.   The surest way to solve problems is to make the quilt completely, solve the problems and make a second one incorporating all solutions.  Ugggh - not for me.  Usually once is enough and I am ready to move on to my next idea.

I am now planning the quilting for my spiral quilt, and have spent a lot of time drawing designs.  I have one motif that flows across two borders of contrasting shades of blue.  I was not sure how this would play out so I made a tester for....uh.....testing.  I made it big enough to incorporate the design from 1/8 of the quilt.  At the same time I previewed possible ideas for thread type and color.  I do not bother fixing minor goofs in stitching nor do I bother tying off thread on these transient endeavors.  The point of a tester is to get a general idea of what it will look like eventually.

Each motif is filled with a different shade of blue stippling.
My choice is on the left.  Ultimately they will all have the same thread. (Click to see large)
After looking at this I decided that I did not like the way the seam line cut through parts of the motif. Back to the drawing board.  I maintained the same idea, but revised it so that the seam doesn't cut anything in half.  The final design can be seen as a totality or as two separate ideas that work together.  Depends on how your brain works.  I have also used my chosen thread.

Glad I tested.  I like this now.
TIP:  Testers take time, but I have never done one that I felt was a waste of that time.  I always discover something that would look better with an adjustment.  I am sooooooo glad that I tested this design and didn't have to unstitch all the quilting or look at it the rest of my life and wish that I had.

Next problem.  I was planning to quilt the spirals with stitch-in-the-ditch only.  However, the quilting on these outer borders is very dense so I think I need to come up with some more quilting on the spirals for balance.  I started working on that as I lay in bed this morning trying to avoid throwing off the covers and facing the cold air of morning.  I call that process free motion thinking.

I leave you with another quote from the above mentioned magazine.  Pam Rocco (p 48) states,
" 'You must plan to be spontaneous.'  David Hockney, a very sensible British painter said that.  I proved it to myself by making a quilt that glows.....  That it glows is an accident, but I did plan, which is how the accident happened."            Wrap your mind around that one!!

Sew a happy seam this week.  I wish you only happy accidents.


Monday, September 19, 2016

When Points are Really Points.

Last week I dealt with fabric "spaghetti" caused by a design flaw (my bad), where I had too many points coming together in the same place.  It was a mess, but was solved relatively easily.  Spiral quilts have many points and it takes some experience to be able to think ahead about the difficulty, or lack thereof, in sewing them together perfectly.   This week I will show you some lesser pitfalls of quilty points that come together in seams.  When paper piecing it is relatively easy to get sharp points, but it is not so easy to maintain control when they come to a point in a seam.

Don't bother with lots of tiny points coming close into the center (see here) unless you want fabric spaghetti.  Likewise it doesn't work well to have tight points coming together at a corner where you plan to attach a mitered border corner.  In the situation below I could see trouble coming as soon as I sewed the seam.

Tiny point at the corner.
I could tell that this was going to be a nightmare if I wanted to achieve perfection.  I am sure it can be done, but I chose not to hassle it.  So here's what I did:

Corner redo.
I took some border fabric and created an arrow effect in each corner.  I will quilt along the original seam lines to give the effect of a ghost point and to carry through the idea.  No problem getting that perfect.  It also looks nice on the quilt as a whole.

Wide angle points should also be sharp, and they are easier to manage.  There are two of these in the above photo.  The light blue corner (top of photo) and the dark blue of the added piece where it meets at the seam.  You glue the raw edges of the seam allowance together, but add extra glue on the seam allowance of the point fabric all the way to the seam line.  Make sure the folds of the two pieces come together perfectly AT THE SEAM LINE.  Press.  Carefully check the right side.  Sew and it should be perfect.  If it isn't you can easily un-stitch, pull the glued edges apart and try again.  If that doesn't do it, try sewing the seam in the other direction.  You could also baste across the meeting of the points.

TIP:  Again:  Use only Elmer's School Glue.  It is completely washable and will not harm the fabric.

The tiny, points at a seam line are a lot harder.  From a distance they may be fine, but look closely to make sure.  They much prefer to nest than line up.

TIP:  If you are designing a quilt try to avoid having to match teeny, tiny points in a seam.  Think ahead about how you will stitch every single seam and whether you are willing to accept the consequences (ripping and re-doing) if it doesn't go together the way it did in your dreams.

Unacceptable mis-match.
I restitched this twice by the above method, but was still unable to achieve perfection.  So, on to another solution.  I unstitched about 3/4 inch across the point.  From the back I took a tiny stitch or two at the point of the light-colored fabric to make sure the folded edges came together perfectly where I wanted them.  Then from the right side I used tiny ladder stitches to close the opening.  By doing it from the front I could manipulate needle and fabric to make sure all was in line.  It is well secured, and quilting will later reinforce the hand stitching.

Perfect point.  (Sorry, color variation and poor focus spoils the effect, but it is perfect!)
TIP:  Try, try again, but be careful not to destroy your fabric.  Sometimes hand stitching works best.

Sew a happy seam this week.  I wish you perfect points always.


Monday, September 12, 2016

When Spaghetti is the Main Course

Quilts and spaghetti don't really go well together.
  • Spaghetti stains.  Need I say, "Don't eat it in the sewing room?"
  • Spaghetti inherently requires noodles, which are full of carbs and cause fat retention.  Try the sauce on veggies or quinoa instead.
  • When you are eager to get to sewing you may forget to put it in the crock pot at noon to cook, resulting in no dinner to fill your tummy after burning lots of sewing calories.
The other kind of spaghetti has no calories, does not stain and "cooks" as you sew, although it may cause temporary, frustrated hair pulling.  This is the center of my quilt with 8 seams coming together with a seam down the center of each piece = 16 seams!  Is that a mess, or what?  I couldn't even attempt stitching because, with the paper from paper piecing in there too, I couldn't get the presser foot to go over it.  I love my baby spiral better every minute and can't wait to cut this mess out and attach the spinning center.  I have to pull out the paper backing first and that is tedious, but is a great bit of television handwork.

Spaghetti at center point.
Additionally there is the problem of skinny points in my spiral quilt.  It begins with the design.
Pattern with fabric sewn to other side (seam allowance untrimmed).
These big triangles will be sewn together down the center.
See the arrows (click to enlarge)?  They show the troublesome, long, elegant strips of fabric.  Now imagine all these skinny pieces of fabric with 1/4 inch seam allowance between all of them.  Then sew the two main shapes together and you have another seam with another 1/4 inch seam allowance.   The result is major spaghetti.  The points at the very bottom are the center of my quilt and this is only one quarter of the center.  It is a major mess that I did not visualize in the design process.  A real learning experience.  Burned spaghetti!!!  Not only that, but the mess of tiny points is so thick it is impossible to work with.  What to do?  As usual I let it percolate and worked on some less problematic point challenges, which I will address next week.  

TIP:  Got a problem?  Don't despair.  My favorite, and oft-stated recommendation is to sit on it, sleep on it, think about it, and you will eventually come up with a solution.  I do this often!

I was not giving up on this quilt!  I went to my computer to play with ideas, and decided to try covering the center with a four-point star offset from the one already there, then appliqué my spiral into the center of it before appliquéing the whole thing to the quilt.   Ultimately, I will cut away as much of the over-seamed area underneath as possible.

This was not exactly simple, but do-able.  Without the center sewed together the quilt was a bit unstable so that had to be tackled first.  I cut away about 1/2 inch of the spaghetti so I could see what I was doing.  I unglued the center seam allowances (see above) and ironed them open.  That helped the center to lay a little flatter.  Then I pinned six straight strips of fabric across the center to temporarily stabilize it so I could measure the center of the quilt east to west and north to south.  It came out the same!!!  Now it was time to make the star.

TIP:  It is imperative to stay on top of the quilt measurements or you will have difficulty when it comes time to apply the border(s).  It was especially important here because there was real risk of the center going wonky.

Four pieces for a star.
I used one of the above points to cut two pieces of freezer paper ironed shiny sides together as a guide for pressing back seam allowances.  Then I cut the fabric, starched and ironed the seam allowance around the sharp pointed sides of the pattern.  I stitched the four pieces together to hold the center solid.  Next I hand appliquéd the spiral to the center of the star.  I laid the quilt back on the table, measured again, removed the pinned, stabilizing strips, and glued the star in place.

Appliquéing was the easy part.  I did the hand sewing with Kimono silk thread.  I had never used silk for appliqué and I LOVE it.  It is strong, thin and melts into the fabric invisibly.  Hurray!  Very happy.

Here is a graphic of what the center was supposed to look like:

Illustrator version.  Four point star


Here is a photo of the  new center with the appliqué completed:

Red marker is appliqué.  Green marker is the star that is part of the pieced quilt top.
Eight point star.
(click to enlarge)
See how the appliqué points line up over the teensy points?  The worst of the spaghetti is underneath and will be cut away.  Not only did this solution fix the problem, but I really like the way it looks!

Sew a happy seam this week.  I wish you successful solutions to your problems.

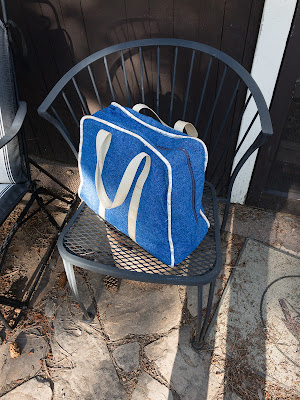
Bagged the Bag

My first attempt at a picnic bag was a fail.  You saw the pictures last week.  I kept revising the design.  I clipped where I shouldn't ...