TIP: You've heard me say it before. Let it sit and percolate. So I did.
Lea McComas does her big, photo-realistic quilts by fusing fabric down onto four layers: background, canvas, batting and backing. As usual I am using her basic method with a difference. Sometimes I don't follow directions well. In order to avoid ruffling at the outer edge resulting from heavy stitching I am stitching the face on canvas. I have made a separate background, which I will quilt. Then I will cut out the finished, stitched portrait and stitch it to the quilted background. I have done this before and have been pleased with the results. That is the overview of my plan.
Now to start. There is a lot of prep work for a project like this so I will give you the short version of my method for a 12x 16 inch portrait. If you want more in-depth instruction I recommend Lea McComas' book, "Thread Painted Portraits."
 |
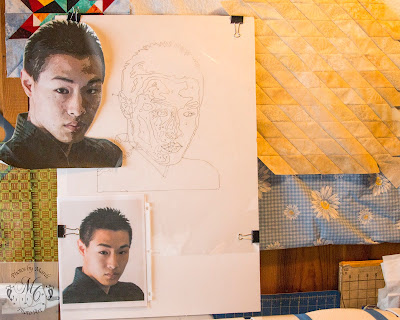
| Photo, posterized full size photo, mylar drawing on foam core board; unquilted background in the back to the right. |
TIP: If you want you can do your posterized version in color, but drop the opacity way down so the color doesn't distract you. That is what I did in the above photo.
2. Tape the posterized photo to a foam core board and cover with a sheet of mylar. Using a black, fine tipped Sharpie draw around all the lines delineating the different values. The pen lines can be erased with a little rubbling alcohol on a Q-tip so don't panic if you make a mistake.
TIP: The fine tip Sharpie is the only one to use (so I am told) because the others don't erase with alcohol. I had some that wouldn't come off from my last project and found that "Goo Gone" does the job too.
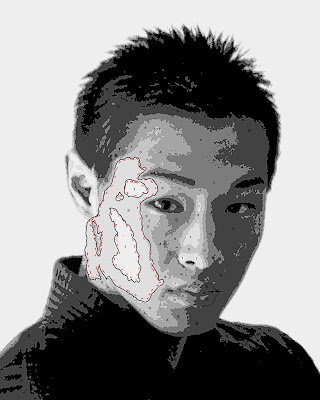
3. Trace the lines from the mylar to freezer paper. You can see through easily to trace. Give each value a number: #1 = very light.......#5 or 6 = the darkest value, and write that number in the appropriate spaces on the freezer paper. Make another freezer paper copy exactly the same. (See - it is a lot of busy-work, but believe me it is worth it.)
4. All the pattern pieces are now marked except the itty-bitty ones. On one paper copy, starting with the lightest value, use a red pencil and make tiny arrows wherever that piece bumps up against a darker value. This will be a guide to remind you where to add a little extra when cutting your fabric so it will go under the darker fabric. Don't worry about the itty bitty pieces. We'll deal with those later.
 |
| Pattern pieces defined and marked. |
 |
| Shows the posterizing better. I tried doing all the labeling on the computer. Forget it. I went stark, raving mad! |
Sew a happy seam this week or do some drawing instead.


Excellent tute. thank you, Mardi
ReplyDeleteThis is going to be a fun project - thank you for sharing with everyone on how to get it started!
ReplyDeleteVery interesting! Thanks for sharing!
ReplyDeleteInteresting! I can't wait to see how it progresses.
ReplyDeleteBelle démonstration je me réjouis de la suite
ReplyDeleteMerci.
Delete