Showing posts with label freezer paper. Show all posts

Monday, October 29, 2018

New Start

With my sewing machine out of town, I cleared off my sewing table and ironing board and set it up for fusing dog fur.  Not literally, but I am going to make a dog quilt.  Scroll down to last week to see the photo of Lady.  I dragged my feet a bit as it was a heavy week and my body was too tired to stand at the ironing board to do the work.  However, I spent the time thinking about the process and the materials needed.  I don't need to buy any fabric and that is always nice as I am a long way from the good quilt stores.  This is a stop-gap project and I will probably not finish it for awhile because I want to focus on the quilt that I am quilting...when my machine gets home from the repair shop.

I think I figured out how to do the bow.  Those tiny pieces look daunting to do in fabric so I decided to paint them.  I love to paint and have ordered a starter set of Textil paints from Marabu.  They are acrylic and reportedly bright and mixable.  The ad I saw says that they are slightly thinner that other acrylic fabric paint, go on fabric smoothly, and leave the fabric with a nice hand.  It sounds too good to be true, but it isn't expensive so I am giving it a try.  I got a starter kit with six basic colors.  I can do anything with that!  I might try to make the ribbon look shiny with a light coat of Mod Podge after the paint dries, but it will be awhile before I get to that.

Now to the dog:
1.  Turn the photo into black and white, then separate the photo into 5 black and white values (posterize in Photoshop).

2.  Draw lines around each value and label each value from 1 to 5, on mylar with a fine, black Sharpie.

3.  On a light box, trace the lines on freezer paper to put under a silicone ironing sheet to guide placement of fabric.

TIP:  I use a plexiglass sewing machine table extension for my light box.  The light is my Ott light, which opens out flat to lay under the table extension.

4.  Repeat step 3.  This copy will be cut to pieces on the lines as patterns for cutting fabric.

TIP:  Cut out one piece of the second freezer paper pattern at a time, using it to cut the fabric piece with fusible attached.  If you cut out all the pieces at once you will never find where anything belongs.

In the photo below you can see where I left out the ribbon.  I will do it separately.  The dark places (eyes and one piece of fur) have already been cut out so you see the dark floor through the holes.  I started with the eyes because they are critical and need to be exactly right.

Lady in outline
Next week I will show my progress in placing fabrics.  It looks daunting, but is really quite simple  I enjoy cutting out the pieces and seeing it all come together.  Each piece is cut 1/16 inch larger around the edges so it will lay under the next piece.  I am starting with the lightest value so I won't have dark edges showing through the white fabric.  I will progress to the next darker value and so on until I come to the black, which will go on last.  The final touch will be the bow, which I will make separately and attach all in one piece.

Sew some happy seams this week, or have fun fusing fabrics.


Sunday, January 14, 2018

More Fusing

I promised to continue sharing my fusing process for creating a dog in fabric so I will get right to it.  All the prep was explained last week (scroll down) so now we start the phase 2 step-wise tutorial.

Step 1:  Iron one of the freezer paper drawings to the ironing board.  I use a portable ironing surface,  18 x 24 inches, for this.  Cover the freezer paper with a silicone ironing sheet that you can see through and secure it with pins or clamps.  You will fuse all fabric pieces to the ironing sheet.

Portable ironing surface, freezer paper drawing, silicone pressing sheet.
Step 2:  Now you will use the other freezer paper drawing as your pattern.  Cut out one piece carefully.  You don't want to cut away wantonly and destroy the other pieces you have so carefully outlined.  I start from the outside and work from there.

Freezer paper drawing
Step 3:  Cut a piece of fusible just a little bigger than your little pattern piece.  I usually cut a rectangle because it is easier to manage than odd shapes.  Iron that fusible to the back of the fabric and cut it out.

Fusible fused to back of fabric.  Placement was determined
by the shading that I wanted.
TIP:  When cutting the fabric be sure to cut it close to the edge of the fusible.  You will be cutting the pattern piece with the right side up and won't be able to see where there is fusible on the back...or not.  If your pattern piece misses some of the fusible it won't fuse.  On the other hand, if you leave any fusible on the back of your fabric you may end up with an unanticipated mess next time you use that fabric.

TIP:  If you are using fusible encased between two pieces of paper you should pull one paper off so it will fuse to the fabric.  Leave the other paper in place for now.

Fused fabric carefully cut away from the rest of the fabric - 
wrong side with fusible up.
Step 4:  Turn the fabric right side up with fusible down, leaving the paper on the back.  Iron the freezer paper piece you cut earlier onto the fabric shiny side down and press it to the fabric.  Cut out the piece leaving a scant 1/16 inch around the outside of the pattern.  This way all the pieces will overlap just enough to hold the whole thing together as you progress.  The joy of this process is that you don't have to worry about the pattern being in reverse.  That drove me crazy when I was taught to do it that way.

Freezer paper pattern piece pressed to right side of fabric that
has fusible on the back.
Step 5:  You will be able to see through the silicone sheet to find where your newly cut piece belongs.  Peel off the paper from the back and the freezer paper pattern, set the fabric in place and iron it down.  Continue until you have created the critter.

TIP:  What if you decide you don't like a piece that you have already fused?  You can heat up that piece and carefully pull it off.  If there is any residue it will be covered by the new piece.  It you want to replace a piece that is already buried by the edges of other pieces, just cut your new piece and fuse it over the old one.  I save all my cut paper pattern pieces in a plastic bag.  Although a nuisance to find, you will have the original paper pattern piece to use again if needed, or retrace from the mylar version of the drawing.

The start of the dog still missing her nose!

Yes, there is some waste, but how many of you consistently avoid waste in quilting?  Unfortunately, it is inherent in the craft.  If I have any sizable pieces of fused fabric I save them for smaller pattern pieces, but there aren't very many nor are they very big.  My method avoids preparing large amounts of fabric ahead of time so less waste.

TIP:  You can find a use for much of your waste.  I save unfused scraps in a trash bag to donate for dog or cat beds.

I have completed the dog and am working on the background by cutting pieces and slipping them under the edge of the dog.  Another way would be to pick up the fused, finished dog from the silicone in one piece (it will hang together if carefully fused) and iron it onto a background.

This project will be put aside for awhile as I return to the major quilt on which I have been working.  My paper piecing paper has arrived.  It is convenient to have the dog on a portable surface that I can set aside until I am ready to return to it.

Sew some happy seams this week.  I wish you a lot of sunshine from these winter skies.


Monday, April 3, 2017

Looking at Labels

Do you make labels for your quilts?  They are required if you enter shows, but even a baby quilt meant to be loved and dragged should have a label.  My gr-gr-grandmother was said to be a renown quilter.  I have some antique quilts that have been in the family, but I have no idea who made them and it makes me sad.  I would like to know if one of them was stitched by her.  I have read in magazines about lovely, old quilts without labels.  Appraisers can tell you a lot about these precious quilts, but they often haven't even a guess as to who made them.  A label with name and place and/or something about the quilt builds a beautiful connection between the quilt and its users or admirers.

There are many ways to label your quilt.  Jenny Lyons of "Quilt Skipper" blog just signs her quilts with permanent marker...on the front!  Most people make a label and stitch it to the back of their quilt.  A friend of mine makes her labels with her signature and the name of the quilt written by hand with permanent marker and sews it on.  My daughter just discovered that her embroidery machine makes unique and beautiful labels for her quilts. A label may be plain or personalized.  As a photoshop freak I like to make labels that relate to the quilt using a photo of the quilt or a fabric that I used in the quilt.

Using the photo from which I made the quilt:
"Columbine"
Sometimes I use the graphic version from Illustrator as the basis for my label:

The hole under my name contained my address, often required for a show.
"Bigtop"
It is fun to photograph a fabric in the quilt and use it as background on the label:


"Reverie"

The largest label I have made is about 8 x 10 inches for a very special, meaningful quilt that resides on my bed:


"Lifetime"

The basic method of making a plain label is to use a piece of fabric that you can write on.  Any fabric will do as long as you can see the writing or printing.    You can buy treated fabric in quilt stores and Joann's.  I don't like these as they are very stiff and a nuisance to sew onto the quilt.  They do hold the color beautifully.

If you want to prepare your own label fabric this is what I do:

1.  Prepare the cut (see #2) fabric with a solution for setting the ink.  I use Bubble Jet.  Using this product I soak the fabric for 5 minutes then let it dry flat on a towel.  Excess solution can be re-used.  A bottle lasts forever!

2.  Cut a piece of freezer paper letter size, and cut the fabric slightly smaller than the paper.  Make sure to remove any stray threads so they don't muck up your printer.   Iron the freezer paper to the treated piece of fabric.

3.  Now you are ready to print.  I find that Bubble Jet doesn't give me quite as much color as I like so I prepare my images with heavy saturation.

4.  Let the ink dry for 30 minutes and wash gently in cold water with a mild detergent for 2 minutes.  Voila!  You have a nice label that you can let dry flat or iron dry.

[5]  I am experimenting with painting the label with diluted "Fabric" Modpodge to see if it will protect it and enhance the color.  You know I have plenty of that stuff around!  It stiffens it a bit, but nothing like the prepared fabric sheets you buy.  If not, it is fine without.

TIP:  You cannot save the treated fabric.  You only prepare as much as you need at that moment.

Sew some happy seams this week.  I wish you the fun of dreaming up creative labels.


Sunday, July 17, 2016

Fusible Analytics

I promised an analytic comparison of two methods of using fusible material to create a quilt.  Both methods leave raw edges and can be quilted anywhere from lightly to heavy thread painting.  Be aware that my analyses are summaries of MY experience and are not intended to take the place of the books and classes mentioned below.

Method I.  I learned this by following the directions in Lea McComas' book, "Thread Painted Portraits," and additionally from attending a class she taught.

1.  Using a posterized black and white version of a photo, trace it on the dull side of freezer paper and carefully label by value (#1 = white, #5= black, #2-4 = in-between values; and/or color).  Starting with the lightest value (#1) mark those edges with a red pencil where you will cut extra fabric to slip under the adjoining piece(s).  Remember to work so that light color goes under a darker color.
    Pro:  This keeps everything clear and straight, and pays off in the end.
    Con:  Time consuming.
   TIP:  Don't rush.  Doing it right saves time in the end.
   TIP:  Pre-shrink the freezer paper by running a dry iron over it, lifting it, then pressing it a second
           time.  Believe it or not, it does shrink and can mess up your plans.

Labeled drawing.  Letters refer to color, numbers indicate value. (Click to view large)
2.  Make a copy of the whole thing by tracing lines and notations.  The copy will be cut apart to be used as pattern pieces.
     Pro:  This gives you a master copy for reference.
     Con:  Time consuming.
     TIP:  A light table is invaluable here, but taping it to a window works too.
     TIP:  Cut your pattern pieces as you go or it will be a major puzzle sorting them out.
     TIP:  I keep the cut patterns in labeled envelopes so I can find them if I change my mind about the
              fabric I chose originally.

3.  Iron your basic, freezer paper pattern to an ironing surface and lay a silicone press sheet over it.  You need to be able to see through the press sheet to the pattern.  Iron fusible material to the back of your chosen fabrics.  Using the cut freezer paper patterns, cut out pieces.  Using the tip of your iron, tack your cut pieces of fabric in their assigned places to the ironing sheet.
     Pro:  The cut pattern pieces are right side up and placed on the right side of the fabric.  No
              confusion.
    Con:  Lots of little, pattern pieces running around.  Potential for unnecessary fabric waste.
    TIP:  To avoid fabric waste, don't put large amounts of fusible on your fabrics at one time.
    TIP:  I like SoftFuse.  It only has one layer of paper and is no trouble to quilt through.
    TIP:  Don't forget to cut extra fabric on your fabric pieces where the red marks are on your
             patterns.

Extra fabric where pattern is marked with red arrows.


Basic pattern beneath pressing sheet;
fabric with fusible and cut patterns on top. 
4.  Once all the pieces are tacked in place to your satisfaction, cover with another pressing sheet and press the whole thing together (in a pressing sheet sandwich).  When cool all those pieces of fabric can be peeled off the pressing sheet as a single unit, which is then ready to lay down on a prepared background and fused down permanently.
     Pro:  So cool!


Method II.  This method was learned during a class taught by Barbara Yates Beasley on creating animal portraits.

1.  Draw outlines delineating color and/or value on clear mylar with a fine, black Sharpie pen.  The backside is used for making pattern pieces.  Each outlined space becomes one little piece of fabric.
  Pro:  The mylar is very easy to work with and trace on; can be erased with alcohol and used again.
  Con:  It is easy to mix up front and back.
  TIP:  Using a posterized, black and white version of your photo may help with the drawing.
  TIP:  Label the backside of the mylar with "Pattern" or some indication as to which side you are
           working with.

Yes, you saw it last week!
2.  Trace the drawing on muslin so you know where to put the little pieces of fabric.
  Pro:  It is easy to put each piece in its place on the muslin.
  Con:  It is easy to get lost if you are looking at the pattern side so you have to remember to turn the
           mylar over to match the piece to its place on the muslin.
  TIP:  If you are comfortable with the computer you can do your drawing on the photo (I use
          Photoshop) before printing, then trace those lines on the mylar.  This would then show you the
          pattern pieces from the front side on the printed photo (no constant flipping of the mylar).

3.  Turn the mylar over to use the backside as the pattern.
    Pro:  Easy to draw patterns.
    Con:  Easy to forget which side you are working on and end up with the fusible backwards.
    TIP:  Mark the backside of the mylar so you know which side is up.

4.  Trace a piece from the mylar basic pattern onto Steam-a-seam 2 Lite, which has paper on each side of the fusible (sandwich style).
    Pro:  It is easy to see the lines for tracing.
    Con:  Sometimes the fusible sticks to the wrong piece of paper and you have to mess with it to
             move it to the paper with the tracing on it.
    TIP:  Check which side the fusible is clinging to before tracing.

5.  Cut around pattern piece roughly, take off paper backing and iron to wrong side of fabric.
     Pro:  Little fabric waste if no mistakes.
     Con:  One more time to remember which is front and back.
     TIP:  Chin up - do it enough and you'll keep it straight.

6.  Cut closely around the piece leaving about 1/16 inch outside the drawn line to nestle under or on top  of adjoining fabric pieces and set in its place on the muslin.
     Pro:  The piece of fabric with the fusible clings lightly to the muslin and pretty much stays put
              until  ironed.

I found that this method messed with my mind:  Wrong side, right side, which side; diddle, diddle dumpling, one ear wrong.  Several errors with wasted time and materials challenged me to remember.

The major problem that I am still wrestling with is that the Steam a Seam 2 Lite gums up my machine needle.  Their website says it was designed to not be gummy, but "if it does" you can use Sewers Aid (silicone liquid) on the needle to help it slide through.  I find myself constantly cleaning the needle with alcohol and applying Sewers Aid.  I am still getting skipped stitches and broken thread especially if I move the fabric toward me.  A 90/14 needle helps a bit, but makes visible holes in the fused fabric.  Maybe that will resolve.  I have done a lot of turning this little quilt to prevent the hiccups, but I miss the freedom of movement, and have given up on considering this as a show quilt.  The quilting is not up to snuff, but I am not doing it over.  Chalk it up to the learning process.  I still love the way my dog turned out.

This is long.  I hope it is helpful

Sew a Happy Seam this Week or try some fabric fusing.


Tuesday, February 16, 2016

Getting Scorched or Stitching Fire

Brain dead this week.  Finishing a quilt always seems to take forever and the Phoenix is living up to its reputation.  It is having an awfully hard time rising out of those ashes.  Under the bird in the lower third of the quilt I have set several small fires.  When I looked at them I had to ask myself, "How many fires have you seen that have a round bottom and look like a rootless tree?"  I went on to other parts of the quilting, but those red and yellow "trees" remained on the periphery and I had to wonder what they were doing there.  Scorched!

Out came my most useful tool...
Seam Ripper
...and off I went reverse sewing the faux fire thread painting. Fortunately all the sewing had been done with a straight stitch and it was easy to slip the ripper under several threads and cut them at the same time.  It took time, but the two main campfires are out, one has been replaced (and looks soooooooo much better).  I don't know yet whether I will redo one more, but we'll see.  I am only redoing one at a time.

I found an interesting way to arrange flames so they look like a fire:

Potential fire
I cut several pieces of freezer paper of variable sizes and graceful shapes, freehand with paper scissors, and laid them on the quilt top until I liked the way they looked.  This example was done quickly for the camera and is not the final arrangement.  The pieces could be ironed down, but I choose not to do that because there is water soluble thread on the back and I don't want to heat it as it seems to lose its solubility.  Note to self:  I need to run an experiment on that.  Anyhow, I will pin my design down loosely and draw around it with my Sew-line white marker.  Then I will stitch the outline with red thread and get busy filling it with thread painting.

I know now that it was worth the hours of ripping to get it right.

TIP:  Sometimes you have to go backwards in order go forward.  If there is a boulder in the trail you may have to retrace your steps to find a way around it.

Sew a happy seam this week.


Sunday, June 7, 2015

Freezer Paper - a Modern Miracle

Freezer paper is an old, kitchen product used for wrapping butchered meat for safekeeping and freezing.  When did you last butcher your meat and wrap it?  Never?  Me too!  However, I use it all the time for quilting.  Freezer paper is versatile with a dull side for drawing and a shiny side that will lightly stick to fabric when ironed, it can be reused numerous times, it is easily stored, you can see through it enough to trace, you can run it through your printer, and it is cheap.  Its only drawback is that it doesn't do dishes or clean house.

It is available at the nearest grocery store.  It comes 18 inches wide on a roll 33 1/2 YARDS long for about $6.00.  Template plastic at Joann's is $1.49 for one sheet 18" x 12", so 33 1/2 yards of that would cost over $150.  Did that wake you up?

Freezer Paper
You can use the freezer paper as a pattern.  Just iron the cut piece to the fabric and cut around it.  Remove the paper and iron it onto the next piece of fabric.

Pattern pieces ironed onto fabric.

You can use it as a stencil.  Cut out the design, place on fabric, and paint in the cutout spots.
Homemade stencil (freezer paper was colored in my printer and
ironed onto a second piece of freezer paper to strengthen the stencil).
It was used to paint the dots on the orange fabric.
TIP:  If you want a sturdier pattern or stencil iron two pieces of freezer paper together.  You can iron them shiny sides together.  You can also iron them dull side to shiny side if you want to be able to adhere it to fabric with your iron.

You can use freezer paper to do paper piecing especially if you have wonky shapes with bias to deal with.  You place your fabrics together in the usual way and iron the pattern to the first piece, but instead of sewing through the paper, you fold it back at the seam line, trim the fabric to 1/4 inch for seam allowance,  and sew right beside the fold of the paper.  Press the seam, and then open the paper  and iron it down to the newly stitched piece before folding on the next seam line and adding the next piece of fabric.  (There is no space for a full explanation of this method.  Let me know if you would like me to do a post explaining it in more detail.)
Sewing beside the folded freezer paper.

Finished piece - freezer paper has been lifted off of the top.

Freezer paper is an integral part of paperless paper piecing.  It is used as the critical guide for placing pieces, and as patterns for individual pieces.  See Christy Fincher's website for detailed directions on how to accomplish this fabulous, precise method of piecing.

TIP:  Using freezer paper for paper piecing doesn't work as well for teeny, tiny pieces.  If your design has very small pieces you are better off using a lighter weight paper such as Solvy Water Soluble Stabilizer and the traditional method.

 You can use the paper for designing.  I have done some Rhapsody quilts as taught by Ricky Tims.  As he suggests, I used freezer paper for designing these quilts.  You can draw with pencil and eraser on the dull side, then turn and fold the paper so the dull sides are together.  Using a spoon, or some sort of hard utensil you can scrape over your pencil lines and they will reproduce in reverse on the other side of the folded paper.  Remember doing that as kids?  Magic!  This will produce symmetrical, kaleidoscope-like designs.

You can trace.  If you draw with dark pencil lines or go over your lines with black pen you can trace the design onto another piece of freezer paper.  It is opaque-ish, but darkened lines can still be seen.  I like to use my plexiglass sewing machine table with a light under it as a light box to make it easier to see.  You can also tape the original to a big window and copy it that way.

You can use freezer paper as fabric backing for printing in your household printer.  Cut a letter sized piece of freezer paper, and iron it to the back of fabric.  You can then run it through your printer.  I use this to print the labels that I design for my quilts.  You can also create fabric from photos or your own graphic designs and print them in this manner.

TIP:  Cut your fabric slightly smaller than the freezer paper, iron it down well, and get rid of any loose threads.  You don't want any fabric or threads hanging off the edges of the paper.

Is your freezer paper too small for your project?  Lay one piece of freezer paper shiny side down on the ironing board.  Cut a 1 inch strip of freezer paper and lay it shiny side up under the edge of the large paper leaving 1/2 inch sticking out.  Iron the big piece of paper to the hidden part of the strip.  The shiny sides will be together.  Take a second large piece of freezer paper and butt the edge to the edge of the first piece on top of the remainder of the narrow strip. Iron.  That narrow strip will hold the pieces together as well as any tape on the market and it won't make a mess if you iron over it.  Have you ever ironed over a piece of Scotch tape?  Gulp!

TIP:  Freezer paper shrinks!!  It shrinks slightly in one direction, but it is enough to affect your pattern pieces and mess up the size of your finished product.  Before cutting patterns iron the freezer paper to your ironing board with a dry iron.  Take it up and then iron it once more.  Then mark and cut your pattern.  That is all it takes to preserve pattern precision.

Now go have fun playing with freezer paper, and let me know if you use it in other creative ways.

Stitch some happy seams this week.

Saturday, March 7, 2015

Looking Ahead, Stuck Behind

Now I am in limbo.  I am quilting my quilt with Kimono Silk thread from Superior, which is lovely thread and nice to work with.  The downside is that I have to order it online.  I ran out of the thread for my border three inches from the end of the last side, on the final side of a feather.  So my quilt sits sullenly on my sewing table waiting for the thread to arrive for the five minute finish.  What is a girl to do but start a new project?  I am a "finisher," but never averse to a fresh start when circumstances dictate.

The new project is a Phoenix that I adapted from the beautiful artwork of my 15 year old granddaughter, with her permission.  She had decorated her father's iPad with it so I took a photo, made some minor changes so I can sew it, enlarged it and have admired it basking in it's own paper glow on the sewing room bed.  With a 20% rewards discount and a $20 gift card I spent an hour in the candy - I mean quilt store and bought my fabric for about half price.  What a deal, and I am so eager to get started.

What am I going to do?  I am going full bore into thread painting this gorgeous red bird.  I have never done any serious thread painting so I am using the pattern of one wing only to experiment with the process.  Am I the only one who starts a new technique running instead of walking?  Wish me luck!

First I used my new Inktense pencils to "paint" the background as in the original artwork.  I will fuse the Phoenix onto this background and then thread paint.  The bird is made up of many feathers, which I will cut from batiks and fuse to the background.

Here is the process as suggested by Lea McComas:

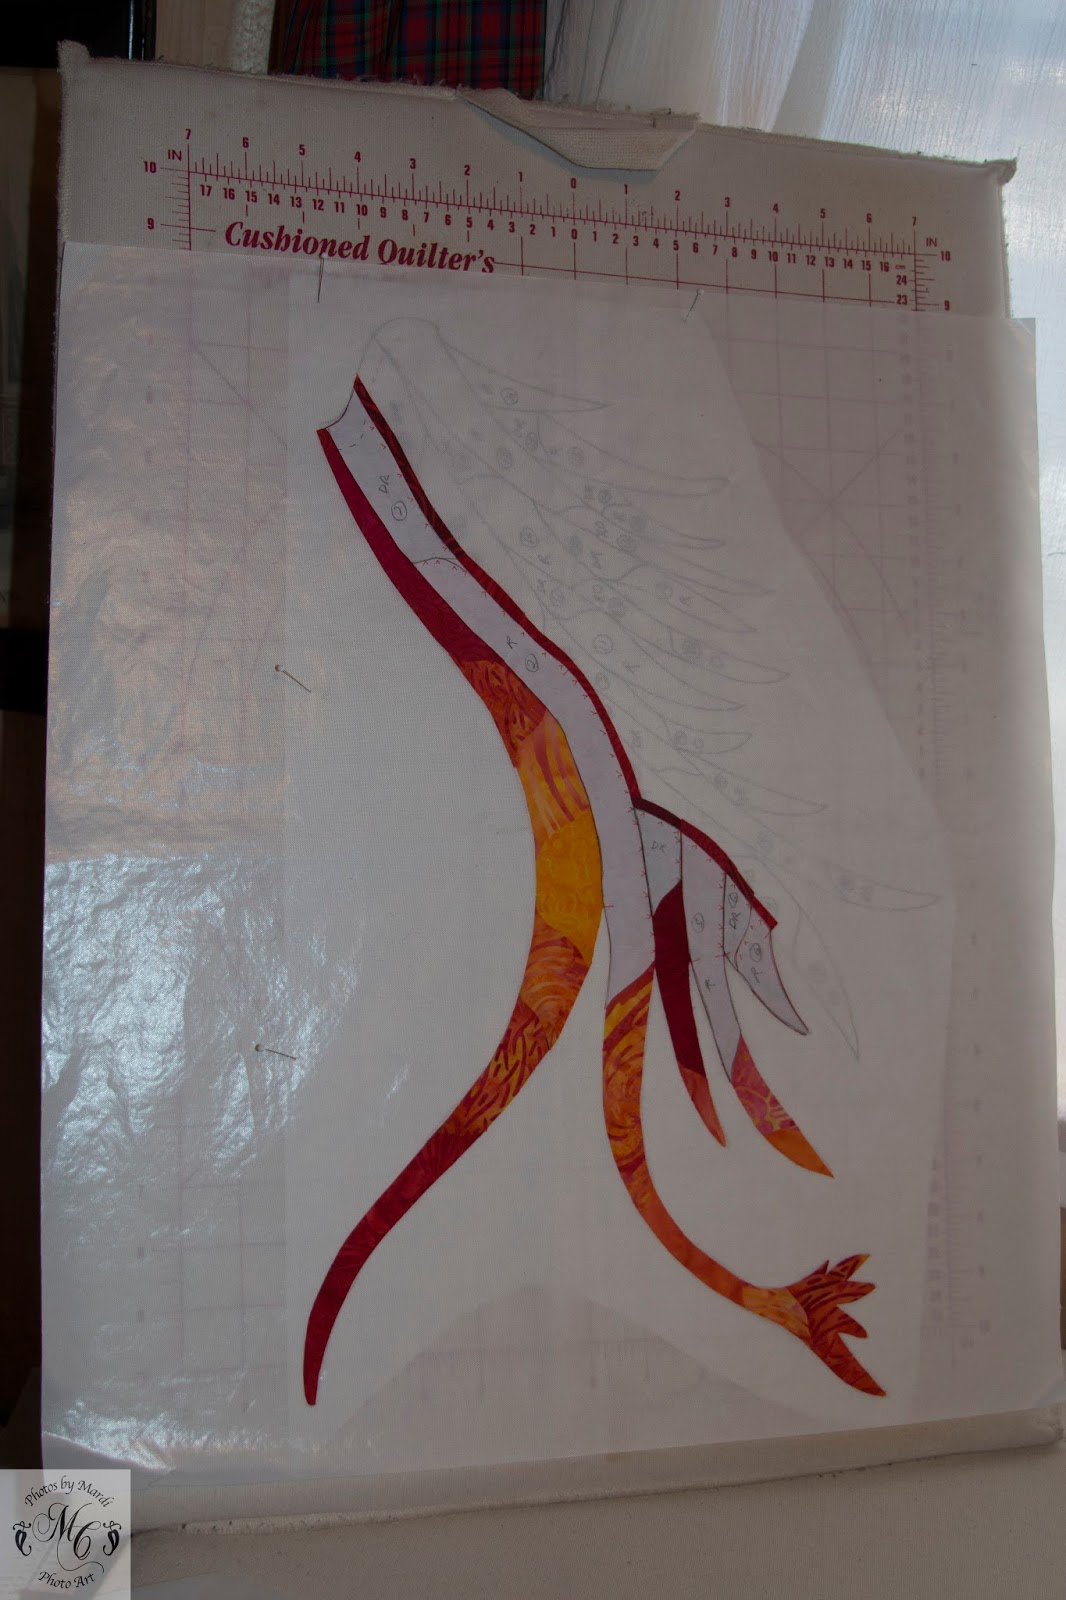
Trace a line pattern on freezer paper from the full-sized, printed design marking with little red arrows where extra fabric will be cut to fit under the adjacent piece.  The color of the fabric to be used is noted on the pattern piece.

Full-sized pattern (color at 50%) with line drawing on top.  This will not be cut.
Cut the freezer paper pattern apart on the drawn lines (sorry no photo before I cut it apart).

Iron fusible material to the back of the fabric.  I use Soft Fuse, but I hear Misty Fuse is excellent too.  Press the freezer paper patterns to the right side of the appropriate fabrics and cut them out.  I love this method as you don't have to remember to reverse the pattern as you would do if you were marking the fusible itself.  That would drive me nuts on a complex piece like this.

Left: front side with freezer paper patterns. Right:  fusible material on the back side of fabric.

Pattern piece cut with extra fabric as needed to go under another piece.  See the red arrows?

Lay the uncut line pattern on a light table and tape it down securely.  Cover it with a teflon sheet (you can see through it) and arrange the pieces on it.  Carefully lay another teflon sheet on top of the arranged pieces to protect your iron from errant fusible gunk.  Iron it all together, let cool, and lift the fused fabric off the teflon in one solid piece to the background fabric.  Iron to the background fabric.

Test piece for practice.
Create a quilt sandwich so you can test the quilting process and threads.

This small piece (12 x 18 in) is strictly for testing, but it has taught me a lot already.  It consists of one full-sized wing of the bird on a full-sized example of the background.  I will use pencil to lightly mark the outlines of some of the feathers and thread painting will blend and shade colors as needed.  What did I learn so far?

1.  I need to make the line drawing twice on freezer paper with all the markings.  One will serve as reference and the other will be cut apart.

2.  This is an insane puzzle so I need to number each little pattern piece to avoid spending so much time trying to figure out where the pieces go.  They don't look the same when the extra fabric is included on some sides, but not all.

3.  I need to allow for better gradations of color from light gold to red.  These fabrics are from my stash and are not the ones I will use for the real quilt.  Some are woven and some are batik.  I have some really luscious, blendable batiks, but I didn't want to use them up on the tester.  I also wanted to see how woven fabrics work with the thread painting.

4.  I don't want the background to show through any fabric (see the yellow on the right).  I need to use a darker fabric, or line the light fabric, or not paint the background where the bird will fly.  The latter is my choice.

The next part of the project is to try my hand at thread painting.  I also want to see how my fabric markers work on the painted background, but now my blue, silk  thread has arrived and I must finish my other quilt.  I'll come back to the Phoenix while the other quilt dries on the blocking board.

TIP:  Take the time to test if there is any uncertainty of the results.  It is well worth the time it takes, as you can see.  A little extra practice is never wasted.

Stay tuned to find out what other challenges surface with the tester that have to be addressed before making the quilt.

Saturday, October 18, 2014

Marking the Quilt

I promised to talk about the quilting of my spiral quilt this week, but I think it is important to address marking techniques before I go into the actual sewing process.  As a newbie I was deeply puzzled about how to mark my quilts, but slowly I learned many different methods with varying degrees of success. I will share with you my opinions about the tools that I have used over the years.

1. Chalk
Chalk for marking is available in pencil form and powder form.  The pencil form has pieces of chalk that fit in a mechanical type pencil.  The chalk comes in several different colors, and refills can be purchased.  The powder form is used in a dispenser with a cog roller at the bottom.  You can purchase refills in white and blue.

Pros:  Tried and true method for marking fabric.  Easily removed.  Chalk sticks can be sharpened, but the point doesn't last long.  Both come in colors that will show on light and dark fabric.
Cons:  Chalk sticks break easily.  Chalk brushes off easily so you can mark only a small area at a time.

Chalk
2.  Pouncing Chalk
To do this you must first punch holes in a paper pattern.  This can be done by running the paper through the sewing machine using an unthreaded needle to outline.  By stapling several layers together you can make more than one punched pattern at a time.  However, usually you can use the same piece several times.  Once the holes are punched, lay the pattern on the quilt bumpy side up and gently glide the pouncer across the template (don't whack it from above).  Lift the template and the chalk outlines your design.  The chalk comes in both white and blue.

Pros:  Once the holes are punched this is easy and accurate.  Either white or blue shows up well on most fabrics.
Cons:  The chalk rubs off easily so you can prepare only a small area at a time.  It doesn't work well for a very complex design.

Pouncing chalk and Golden Threads tissue
3.  Golden Threads Tissue
This tissue is a sturdy, yellow tissue paper that is great for punching holes for use with pouncing chalk.  You can also draw or machine stitch (unthreaded) the design on the paper, pin it to the quilt, and sew through paper and quilt.

Pros:  The design is clear and easy to follow.
Cons:  This paper is too thin to run through a printer.  If you sew through it on the quilt you must pick out the paper when you are done, and some tiny pieces invariably get stuck in the stitches.  I have a good pair of tweezers on hand for this problem.

4.  Blue Water-soluble Marker
This marker has become a standard in the industry.  It leaves a blue mark on the fabric which disappears with water.  DO NOT IRON.  There is also a Blue Line Eraser currently available (I have not tried this).

Pros:  Works beautifully and is one of my most used tools.  It stays until I am done with my quilting.  Washes out with water.
Cons:  Doesn't show up on dark fabrics.  Can dry out, but you can keep it in the freezer between uses and it works like new (I have not tried this).  Cannot iron over it.  I have also heard that the ink sometimes disappears spontaneously (hasn't happened to me!).  As I say, I have encountered no issues with this marker on my quilts (100% cotton), but some people have had problems.

Blue Water-Soluble marker
5.  White Marker
There are two white markers on the market.  One is water soluble (I have not tried this) and the other disappears with heat, i.e. the iron.

Pros:  Shows up on dark colors.
Cons:  My experience is with the heat-removable variety.  I found that it didn't show up immediately, which I don't like.  When it finally appeared, it was hard to see.  I marked a big quilt and by the time I got 1/4 of the way through my quilting all the white marks had disappeared and had to be re-marked.

(No photo - I no longer use this)

6.  Purple or Magenta Disappearing Ink Marker
This marker is visible for 2-3 days and disappears when exposed to air or water.

Pros:  Handy for marking when needed for only a short time.  Can be removed with water if desired.
Cons:  Doesn't show up on dark colors.

Purple and Magenta Disappearing Ink markers
7.  Ceramic Pencil
I love my ceramic pencil.  Mine is made by Sew-Line, but there are other brands.  The ceramic "lead" is like chalk, but is sturdier, thinner and doesn't brush off as easily as chalk.  However, it can be erased with the eraser on the pencil or by rubbing with a piece of fabric.  Refills of the ceramic filler can be purchased in several colors.

Pros:  Easy as a pencil to use.  Gives a fine line.
Cons:  Keeps getting buried under fabric because I use it so much!

Sew-Line Cermaic pencil
8.  Colored Pencil
Colored marking pencils come in several colors and have for years.

Pros:  Marks a relatively fine line.  Doesn't smear.  Lasts long enough to do the quilting.
Cons:  Yellow may be difficult to remove.  Constantly need sharpening and the points break easily.

(No photo - I don't use these either)

9.  Frixion Pen
These pens come in different colors and can be purchased at office supply stores as well as quilt stores.  A hot iron removes all visible marks.

Pros:  Easy to find for purchase.  Gives a clear fine line.  Several colors.  Will iron off.
Cons:  Although the color of the ink is removed by the iron, a residue is left on the fabric, which shows up if the fabric is frozen.  Sometimes it shows without freezing.  I do not use these.

Frixion Pen
10.  Freezer Paper Template
I recently stumbled onto this one.  Trace a design on freezer paper and cut it out.  Iron it onto your sandwiched quilt and trace around it with the blue water-soluble marker or ceramic pencil.  Remove the freezer paper and repeat where needed.  Works great.

Pros:  It is easy to trace a design on freezer paper.  It stays put after ironing while you trace around it onto a quilt sandwich.  The template can be reused numerous times.  It is cheap.
Cons:  It takes time to cut out the template.  You have to be careful not to iron over any of the blue marker if that is the marker you used.

Freezer Paper
11.  Hera Marker
The Hera Marker is a plastic tool with a sharpish "blade" on one end.  It is not sharp enough to cut anything.  You can draw a line by pressing the blade end on the fabric.  It leaves an indentation that lasts long enough to sew a short distance.  You can draw a curve or a line on which to perch some motifs so they will line up properly.  Also useful for "finger" pressing.

Pros:  Handy and quick to use.
Cons:  Indentation is short lived.

Hera Marker
12.  Sulky Sticky Fabri-Solvy
This is a fabulous water soluble product.  You can draw on it or run it through the printer, peel off the paper backing, and it sticks to the quilt with a light adhesive.  You quilt right through it and the quilt sandwich.  You can also use it as a soluble stabilizer.

Pros:  Stays put while you quilt, but pulls away easily if you need to reposition it before sewing.  I used it for a complex design that I wanted to be as symmetrical as possible, and it worked beautifully.  It completely dissolves in water with a little soaking and a little hand agitation.  I have used it on 100% cotton and it does not appear to have left any residue.
Cons:  It is more expensive than other options (about $15 for 12 sheets 8.5 x 11 inches).


Below is a piece of recent quilting I have done.  The animals were cut from freezer paper and I traced around them with a ceramic pencil.  I also used the ceramic pencil to place the red diamonds as they had to be positioned relative to the quilt's center.  I tried pouncing chalk for the feathers, but the chalk dots looked like a starry sky and I couldn't tell where to quilt.  Eventually I drew the border design on tracing paper, scanned it into my computer, printed it on the Sticky Fabri-Solvy, stuck it to the quilt and began quilting. Fabulously easy!  The fillers and the lines of pebbles were done freehand.  All quilting was FMQ on my Viking domestic machine.  The feathers were painted with Shiva Paintsticks after the quilt was all finished.

A portion of my quilt "Bigtop"
The caveat to all this is that you should test any marking tool on the fabric that you will be using.  There is no single way to mark a quilt.  Your choice of tools depends on the quilt, the quilting design for that quilt, and whether you are able to draw freehand with the needle...or not.  I like to draw out my major designs, but do all my fillers freely.  I usually use more than one technique before I am finished with a quilt.

TIP:  Don't be afraid to try new techniques.  Some work, some don't.  Some work for me, but not for you.  Experiment!

Monday, May 19, 2014

Appliqué to Background

Appliqué can be applied several ways.  It can be sewed on by hand (needle turned), and within that category there are tricks using freezer paper, starch or glue.  The fabric can be fused or glued to the background and the edges sewn down with the machine.  Satin stitch done with a tight zigzag is common and looks lovely when done well.  There are many special stitches on machines today that can be used. 

TIP:  Experiment with the fancy stitches on your machine.  They work best with stabilizer under the fabric.

My favorite method is to use a fusible material, iron the appliqué to the background, and sew it down with a machine blanket stitch.  I trace all my appliqué pieces onto Soft Fuse IN REVERSE.  It stays soft.  It has paper on only one side, and that paper stays on until you want to take it off.  It is easy to pull off when you are ready.


First the designs are drawn IN REVERSE on the paper side of the fusible material.   If you are using fusible with two paper sides, read the directions for which side to use.


TIP:  I often squeeze all the designs that will be made from the same fabric together about ¼-½ inch apart so there is little waste, and iron the whole bunch to one piece of fabric without cutting the fusible apart first.  You don’t have to worry about grain on the appliqué.

TIP:  Did you get that?  The designs must be drawn on the paper of the fusible IN REVERSE of how you want them on the quilt.  A new habit to develop! 

Now I sit down with an audio book in the player and carefully cut out all the pieces.  Watching TV is OK too.  I like to get all of the cutting done first to get it out of the way.  What I really want to do is sew and I don’t care to stop in between to cut.


TIP:  I find it helpful to put all the cut appliqué for one background shape into an envelope, label it and put it, the original tracing paper drawings, and the background piece into a folder...one folder for each background shape and its appliqués.  Everything is labeled of course.  It is nice to be able to find it all together when I am ready to work on that part.


Finally, I tear the paper off, lay the appliqué in its predetermined spot and iron it to the background according to the directions of the fusible material.

TIP:  Is it hard to get the paper off before ironing to the fabric?  Use a pin to lightly score the paper in the center of the appliqué piece.  The paper will pop up and is easily grabbed.


TIP:  Use a heat resistant ironing sheet over the appliqué.  It will protect your iron from any AWOL fusible goo.

MAJOR BIG TIP:  reverse (design) + wrong (side fabric) = RIGHT.  Two negatives make a positive! In this case two wrongs make right.  

Why am I do adamant about reversing the design on fusible?  I made a whole quilt backwards one time.  That's why!

Bagged the Bag

My first attempt at a picnic bag was a fail.  You saw the pictures last week.  I kept revising the design.  I clipped where I shouldn't ...