 |
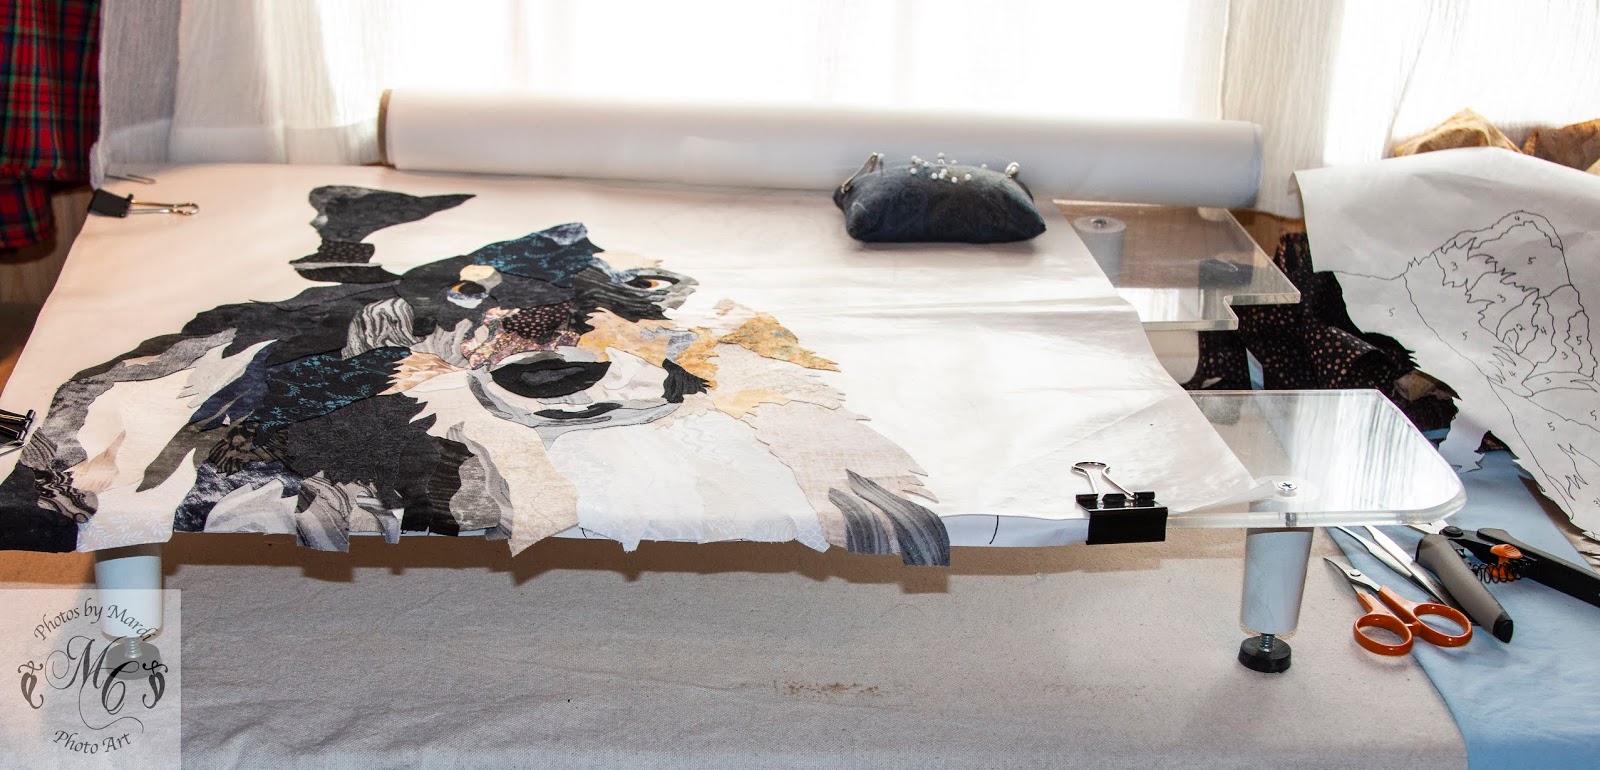
| Set-up for fusing. |
 |
Today I will explain how to get all those different pieces of fabric fused and cut with very little waste. I have a big stash, but still hate throwing anything into the wastebasket.
 1. Cut the piece carefully from the freezer paper pattern. Set it aside.
TIP: These pieces are easy to lose. I often pin them to my pincushion so they can't fly away while I am fussing with fabric and fusable.

2. Cut a piece of fusible a bit bigger (1/4 inch or so) than the freezer paper pattern piece you just cut out. I usually cut a rectangle or circle...something quick and easy to cut. Both fusible (paper side up) and pattern piece are right side up.
3. Choose the area of fabric you want for this piece and fuse the fusible to the back. Leave the paper on for now.
 TIP: I use Soft Fuse, which has paper on only one side. If you use fusible with paper on both front and back, you will have to take the bottom piece of paper off to fuse to the fabric.
4. Cut from the back closely around the edges of the fusible. You leave the back paper on so you can see where to cut. This way you don't have any fabric with unseen fusible left on it.
TIP: Those clippers are fabulous. I got them in the gardening department of Home Depot. Not expensive. Super sharp. Super points.

5. With fusing side down lay the freezer paper pattern shiny side down on the fabric. Press to adhere and cut a about 1/16 inch larger than the paper pattern.
TIP: Do all the ironing on a silicone ironing sheet. That fusible stuff has a way a getting out and messing up your ironing cover.
 6. Now you can pull the fusible paper and the pattern piece off. Your fabric piece is ready to tack to the silicone sheet in its proper place on the dog (or whatever creature you choose to make).
I end up with holes in fabric, but very little lands in the wastebasket and only a few small pieces are left with fusible on the back, which I use as I go along for the the tiny pieces that I need.
TIP: Save all your freezer paper pattern pieces in a container. Sometimes the fabric I choose doesn't look right and I need to pull it off and cut it again out of a different fabric. It is a three ring circus finding the right piece, but it is in there somewhere!
Sew some happy seams this week. I wish you a week of fabric immersion and contained fusible.


Oh, Lady dog is going to be spectacular!!! Looking forward to watching her grow! Thanks for the info on how you accomplish this kind of quilt.
ReplyDeleteI appreciate the time you are taking to share your process. I really do plan to make a pet portrait of our Min Pin Harley for my husband and then on to our bigger dog Bosco.
ReplyDeleteOne question I have is about the silicone sheet your are using. Can you recommend a place it can be purchased or what brand you use. I checked on Amazon, but I'd like your recommendation if you don't mind.
xx, Carol
I am in the market for a new one and I will buy the teflon coated fiberglass. I can't find the one I am currently using, but since I have three different kinds I will do my blog next week on my experience with them and explain why I like the ones I like.
DeleteSo impressive, and it's not even done!
ReplyDeleteThis is so amazing, Mardi! I have a similar pair of spring-loaded scissors that I love for cutting out applique. YES, they are worth their weight in gold! No more stopping every few pieces because your hands are so sore!
ReplyDelete